Collecting taxes for payments
Learn how to configure your payment forms to collect taxes.
Introduction
WP Full Pay provides tools for staying tax compliant.
In this article, we’ll guide you through setting up the plugin for collecting taxes on payment forms.
You can access the tax settings for each form by navigating to WP Full Pay → Forms → Form → Tax.
Which form types support tax collection?
You can configure tax collection on one-time payment and subscription forms, regardless of layout like inline or checkout.
Choose your tax collection strategy
WP Full Pay supports the following tax collection strategies:
No tax
The plugin doesn’t collect tax.
Stripe Tax
The plugin leverages Stripe Tax for automated tax calculation and collection.
Stripe tax rates
The plugin collects tax, and uses Stripe tax rates for tax calculation. The tax rates can be used in a fixed or dynamic manner.
If your tax collection strategy is ‘No tax’ then you have nothing else to do. ‘No tax’ is the default strategy on forms.
If your tax collection strategy is ‘Stripe Tax’ or ‘Stripe tax rates’ then please proceed to the next sections of the document.
Stripe Tax fees
If your tax collection strategy is ‘Stripe Tax’ then additional fees my apply. Please refer to the Stripe Tax documentation for more information.
Using Stripe Tax
1) Configure Stripe Tax on the Stripe dashboard
Stripe has a detailed documentation on how to set up Stripe Tax, please follow the steps outlined in the documentation.
2) Enable Stripe Tax on your payment form
You can enable Stripe Tax on the “Tax” tab of your payment or subscription form:

3) Collect tax ID for B2B payments
If you’re doing B2B sales (either exclusively, or in addition to B2C) then you can collect the customer’s tax ID and business name by turning on the “Collect customer’s tax ID?” option on the “Tax” tab of the form:

Important information when Stripe Tax is used
Collecting the postal code of the buyer
If the buyer’s country is one of countries listed below, then the postal code of the buyer is collected as well for determining the proper tax amount:
- Canada
- United States
Using Stripe tax rates
1) Create tax rates in Stripe
Tax rates can be created on the Products → Tax rates page of the Stripe dashboard, press the “New” button:

In the “Add tax rate” dialog, enter the details of the tax rate (see below the image for more information):

Important notes:
- If you cannot find the tax type you’re looking for, then select the “Custom” type, and enter your own tax label.
- In case of using fixed tax rates, there is no need to choose a region.
- In case of using dynamic tax rates, choosing a country is mandatory. In certain countries and regions (EU, US, Australia), country and state/region must be selected as well.
- The plugin supports exclusive and inclusive tax rates as well.
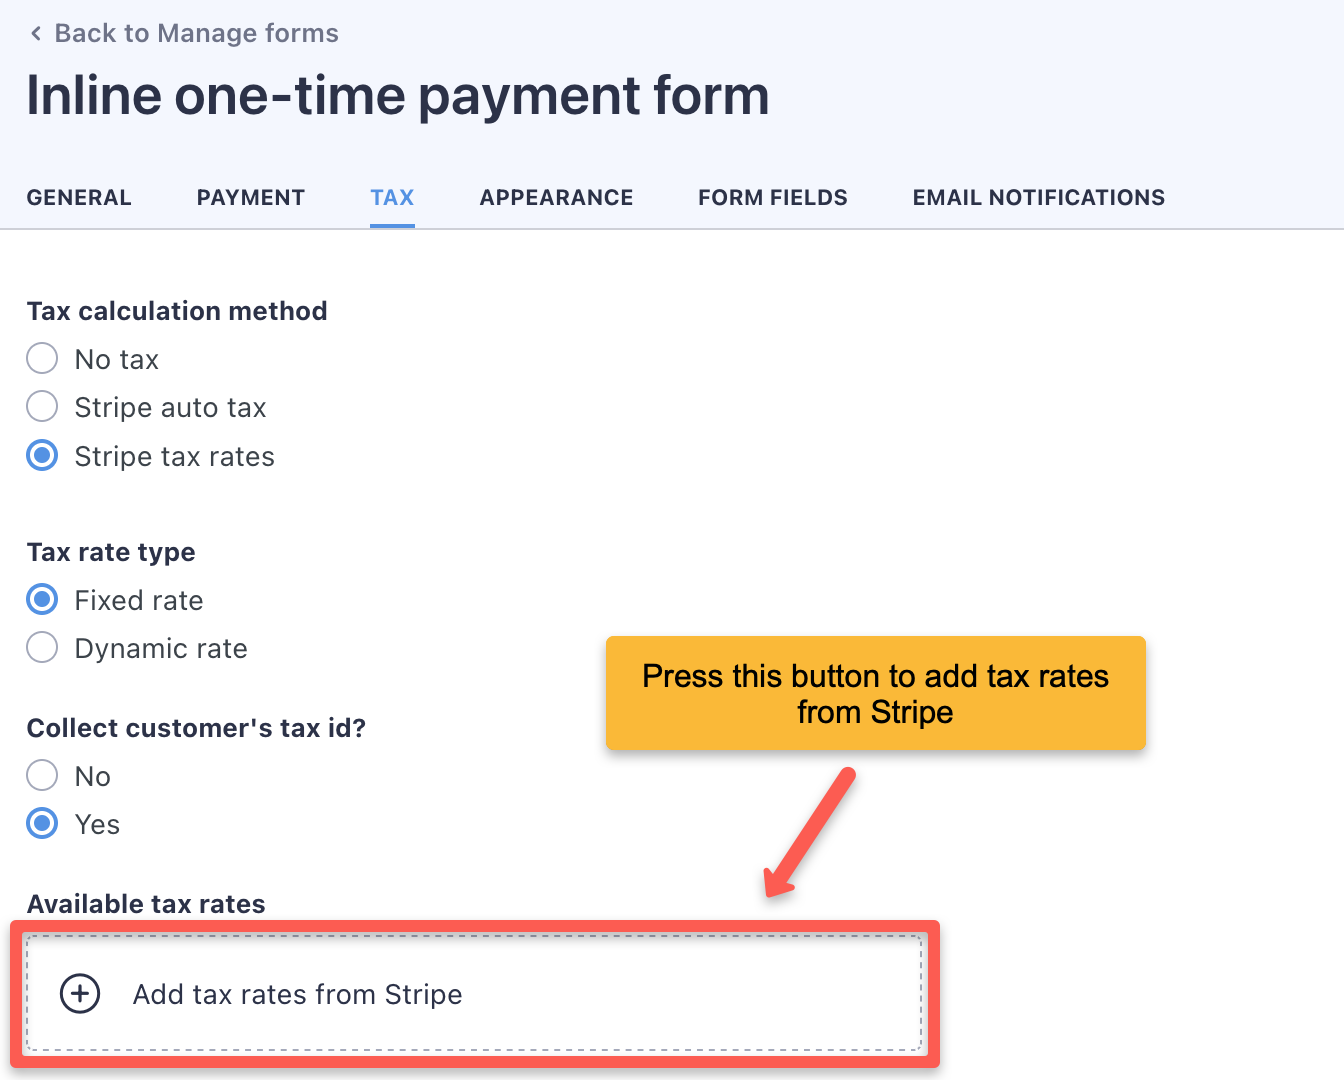
2) Add tax rates to the payment form
You can add tax rates from Stripe on the “Tax” tab of the form, press the “Add tax rates from Stripe” button:
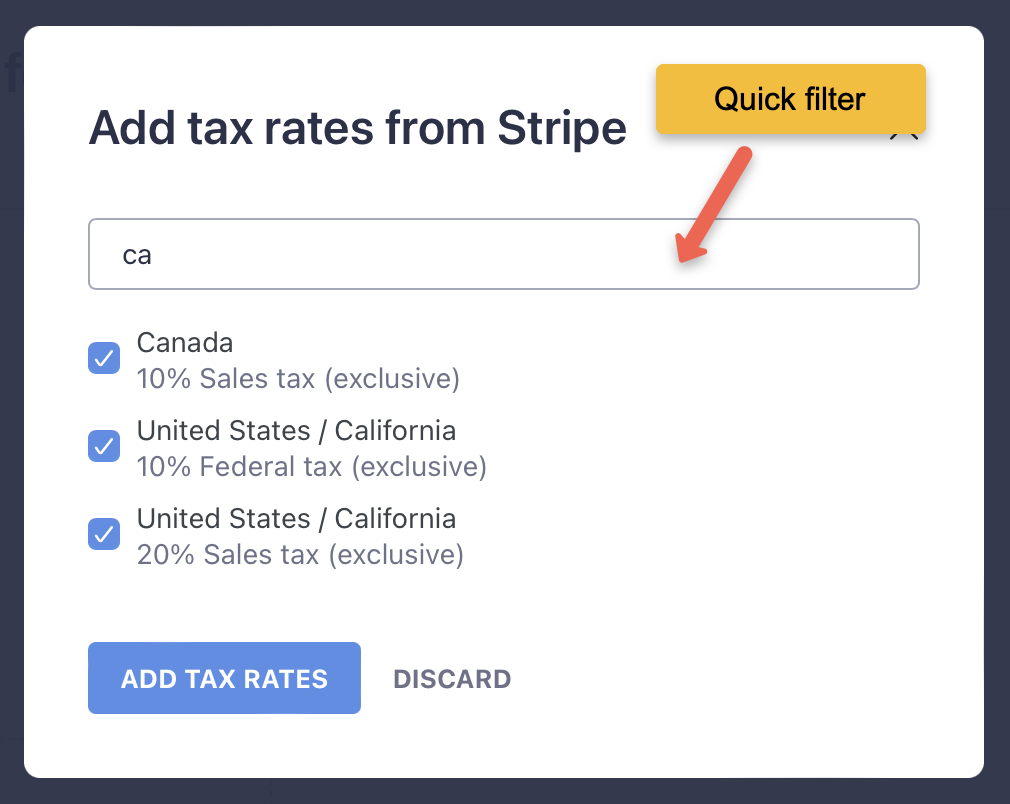
You can quick-filter the tax rate list, and add many tax rates at once:
3) Set the seat country of the seller
The seller’s seat country is needed for tax calculations, you can set it on the “Payment” tab of the form:

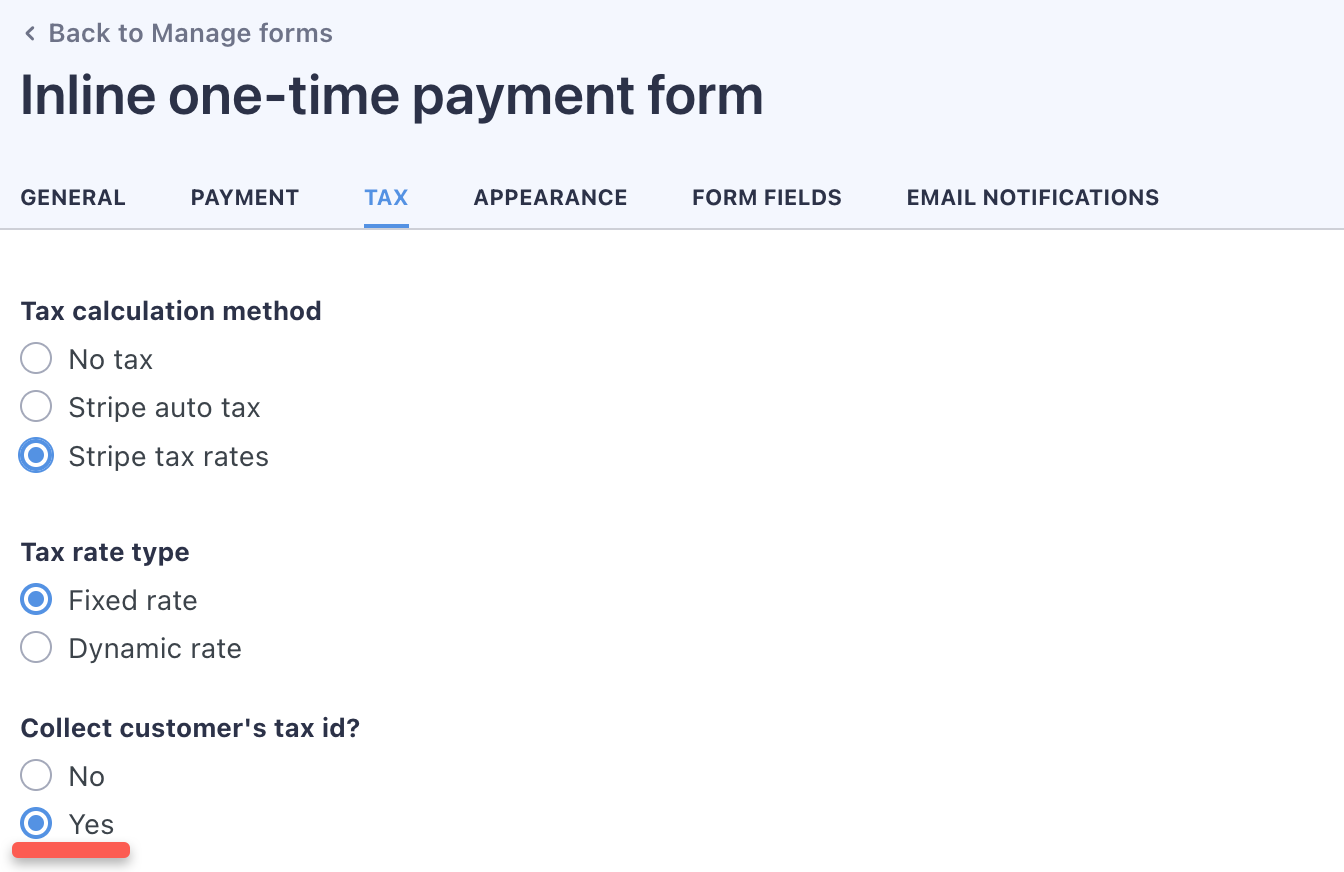
4) Collect tax ID for B2B payments
If you’re doing B2C sales only, then you can skip this section.
If you’re doing B2B sales (either exclusively, or in addition to B2C) then you can collect the customer’s tax ID and business name by turning on the “Collect the customer’s tax ID” option on the “Tax” tab of the form:
Important information when Stripe tax rates are used
Fixed rate rules
When using the ‘Fixed rate’ tax calculation strategy, the maximum number of tax rates added to the form is 3.
Dynamic rate rules
When using the ‘Dynamic rate’ tax calculation strategy, the plugin (on inline forms) or Stripe (on checkout forms) will pick all tax rates which most closely match the country (and optionally state/region) entered by the customer.
Tax rates for countries with states or regions (currently: US)
If you have local and federal tax rates as well, then you have to enter all of them for each state/region, otherwise Stripe and the plugin won’t select them as expected.
Implementing WordPress filters for tax calculations
Implementing a tax rate filter for B2B sales
In some regions of the world (think EU), B2B sales are tax-exempt.
On inline payment and subscription forms, you can determine if a sale is a B2B one, and apply no tax rates by implementing a WordPress filter.
Test your tax configuration
We recommend testing your tax configuration before going live with your payment forms.
We recommend the following steps:
- Put the plugin in test API mode.
- Make test payments
- Observe the result on the Stripe dashboard.