Creating a one-time payment form
In this tutorial, we’ll show you how to create and customize a one-time payment form for selling one-off products or services.
What is one-time payment form?
A one-time payment form is a type of payment form that allows your customers to make a single, upfront payment for a product or service.
This form is designed to collect the necessary information from the customer, such as payment details and relevant details about the purchase, and process a one-time transaction.
Creating a one-time payment form in 8 easy steps
We recommend going through the following steps:
- Switch to test API mode
- Create products/prices on the Stripe dashboard
- Create form
- Add products to form
- Insert form shortcode into a page
- Test-drive form
- Customize form
- Switch to live API mode
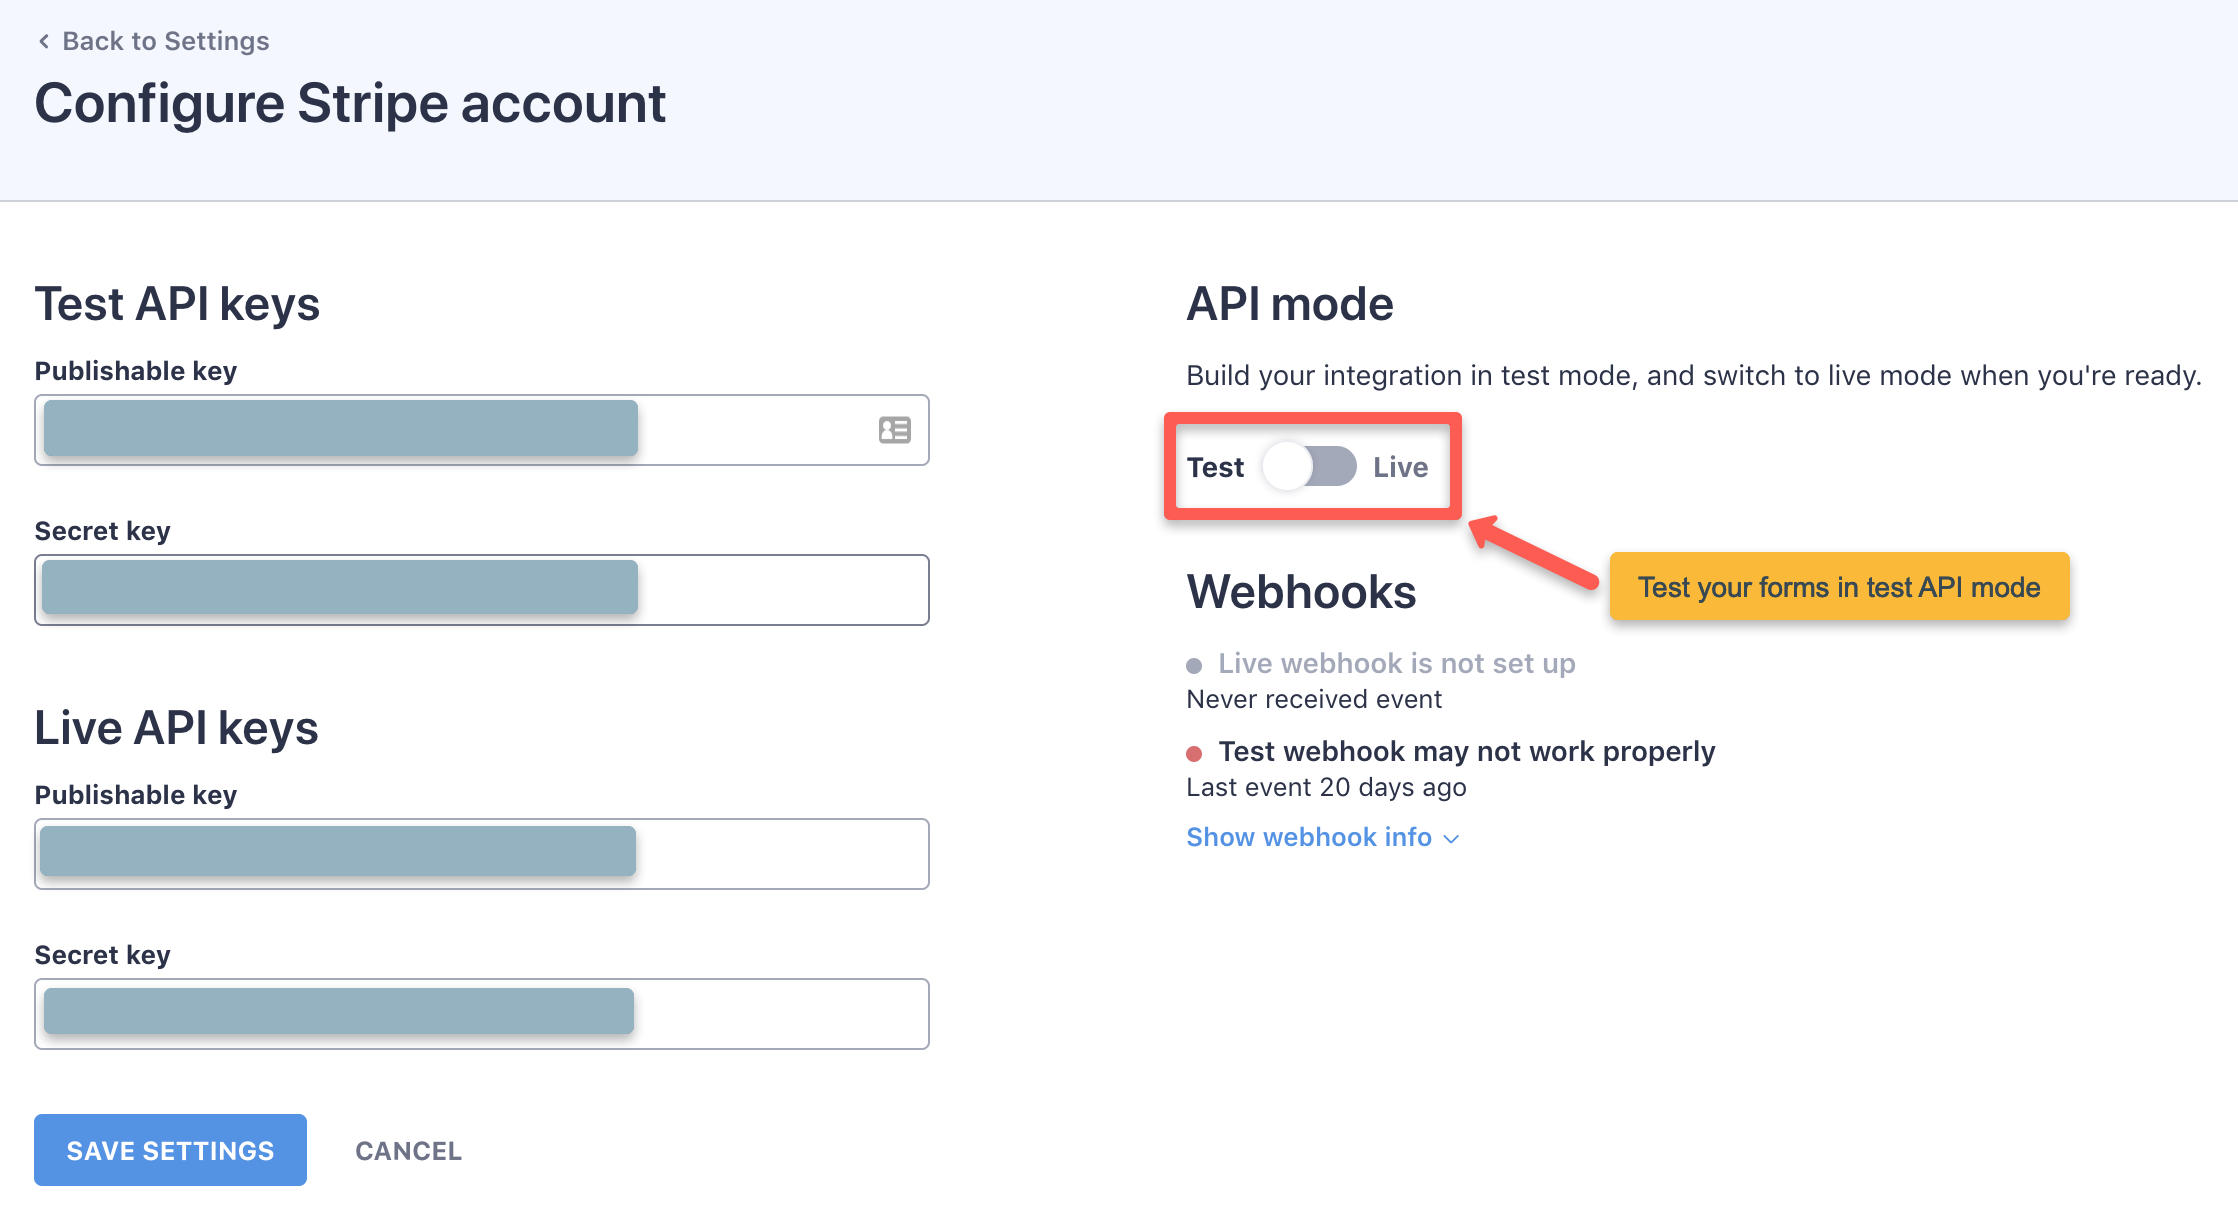
1. Switch to test API mode
This tutorial assumes that you’ve already configured your Stripe API keys. If you haven't, you can refer to our article to learn more about how to configure Stripe API keys.
You can switch to test mode on the “Full Pay → Settings → Stripe account” page in WP admin:
2. Create products/prices on the Stripe dashboard
Do you plan to sell products on the one-time payment form?
If you have a different use case - like paying invoices - then you can skip this step
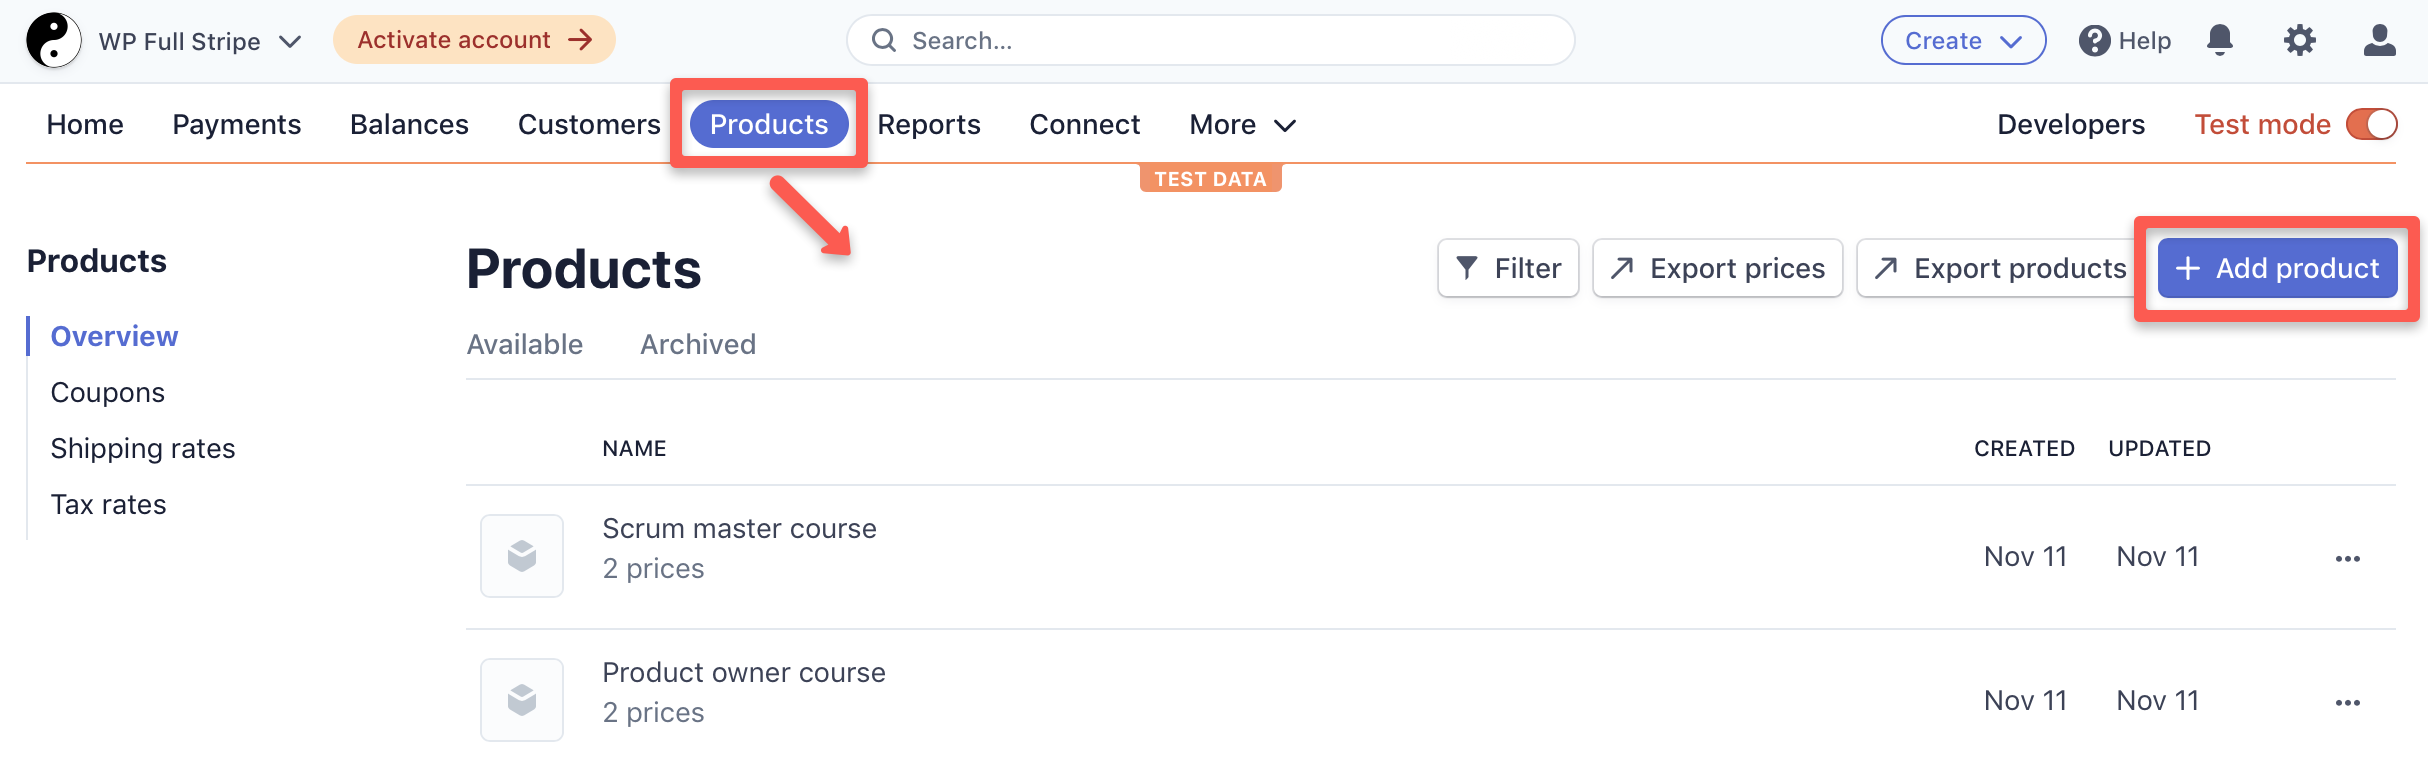
You can add one-off products on the Stripe dashboard.
Make sure that you’re in test mode also in Stripe.
Go to the “Products → Overview” page, and press the “+ Add product” button:
Fill in the essential fields of the product and price, and press the “Save product” button:

Please make sure that:
- The product name is entered
- Standard pricing is selected as the pricing model
- One-time price is selected as the price type
You can create price variations for your product, and you can create as many products as needed.
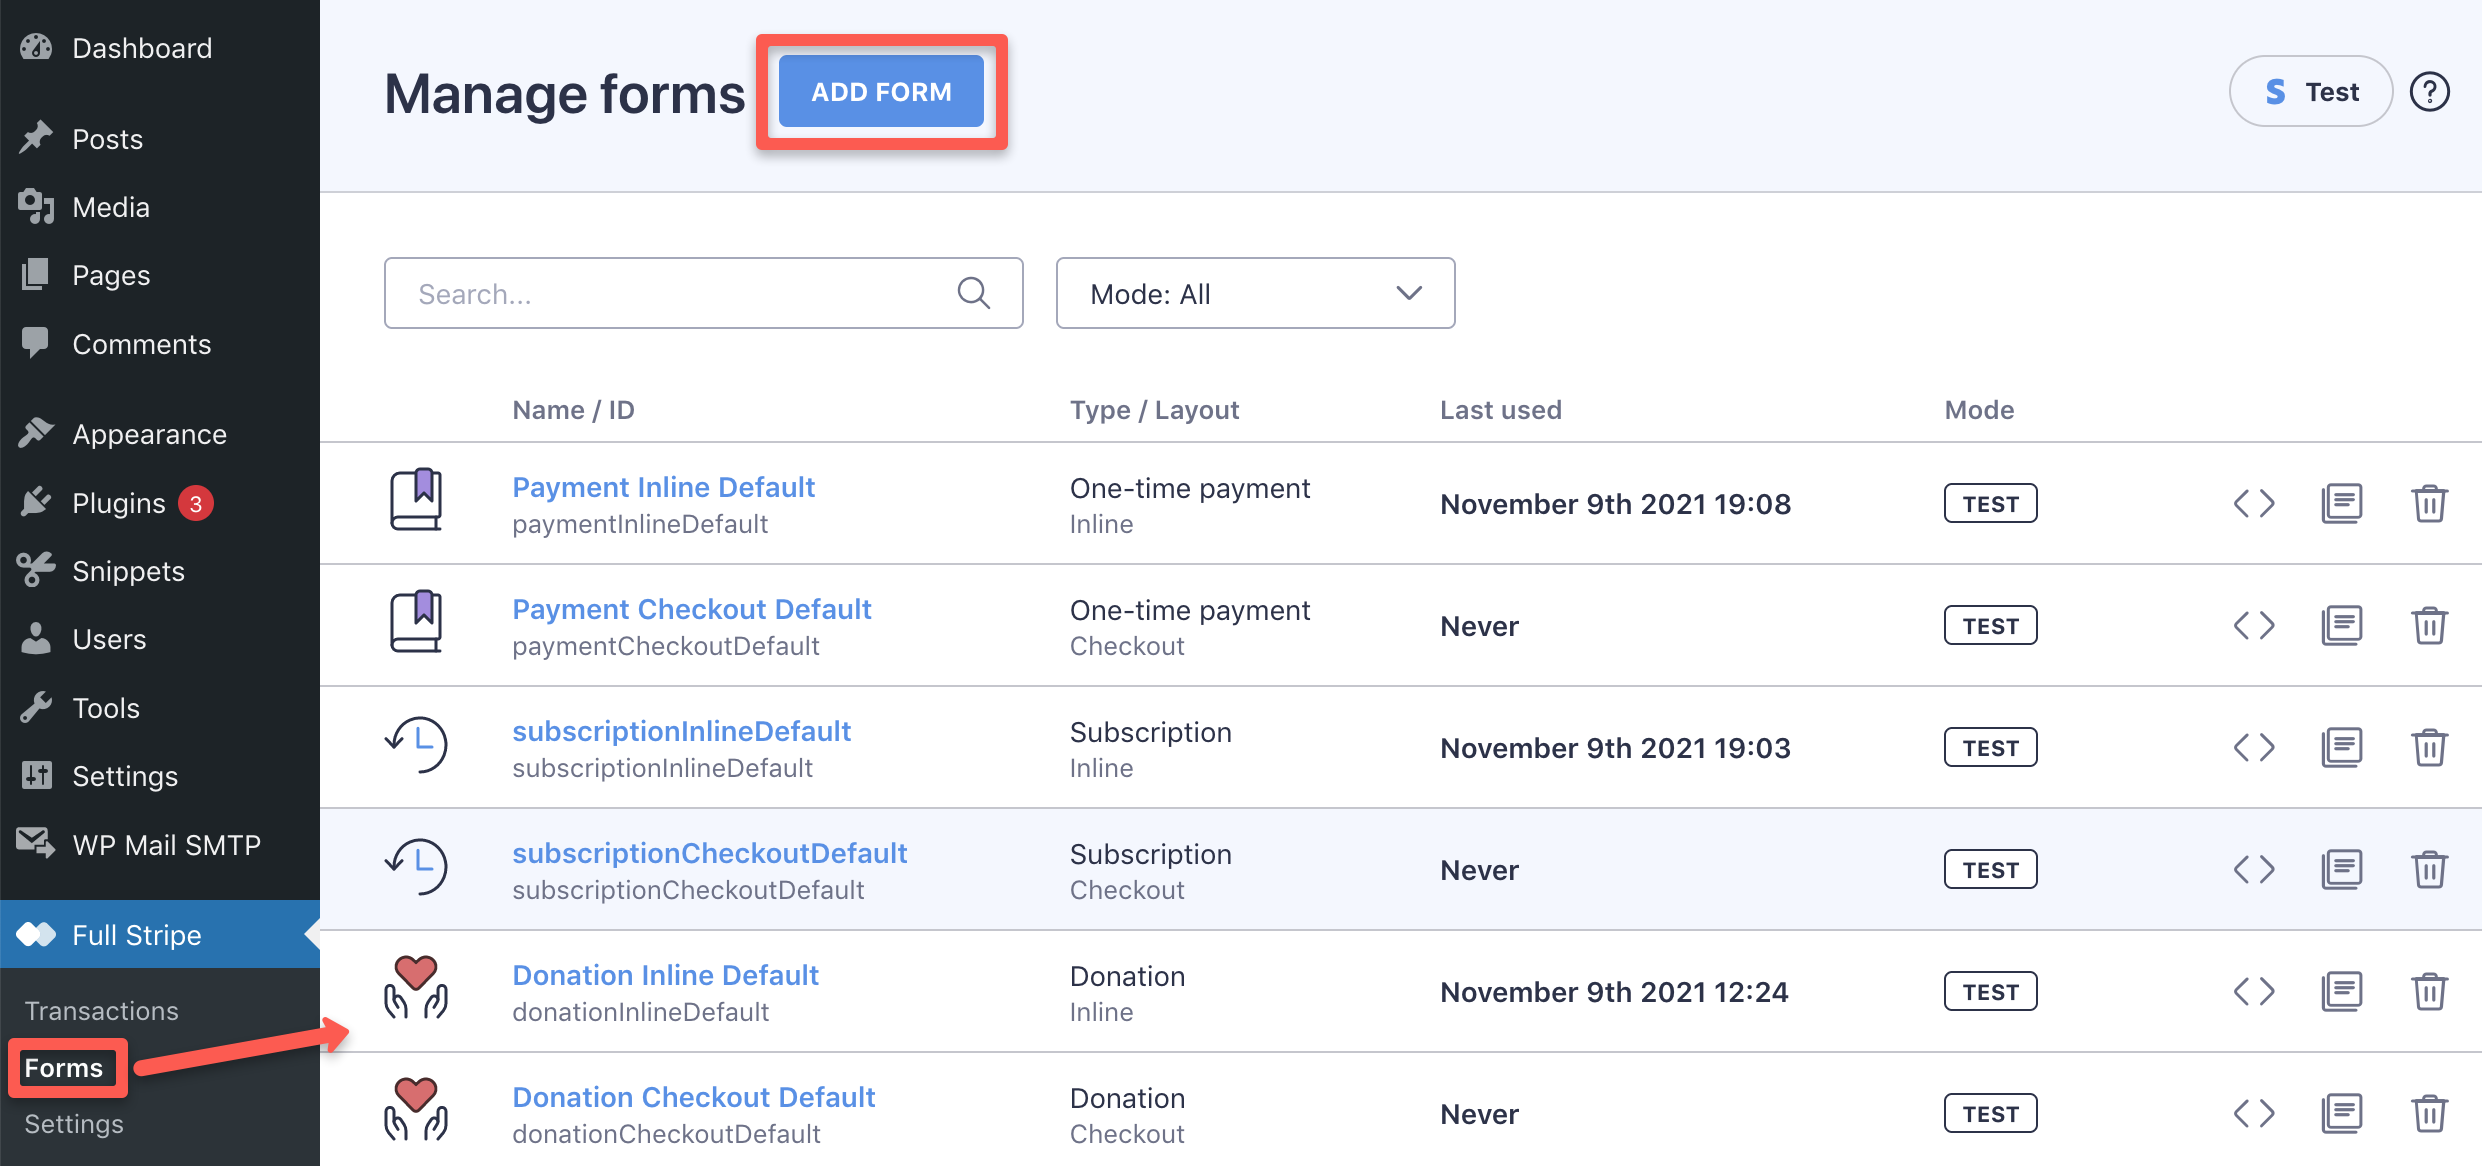
3. Create form
You can create a one-time payment form on the “WP Full Pay → Forms” page in WP admin, by pressing the “Add form” button:
On the next page, enter form name and display name, and select a form layout, and press the “Create & edit form” button:

Inline forms VS Checkout forms
Refer to our article to learn more about the difference between inline and checkout form layouts.
4. Add products to form
Once your newly created form is saved, you’re redirected to edit the form.
Do you plan to sell products on the one-time payment form?
If you have a different use case, then go to the ‘Use cases’ section
You can add your products to the form on the “Payment” tab by pressing the “Add products from Stripe” button:
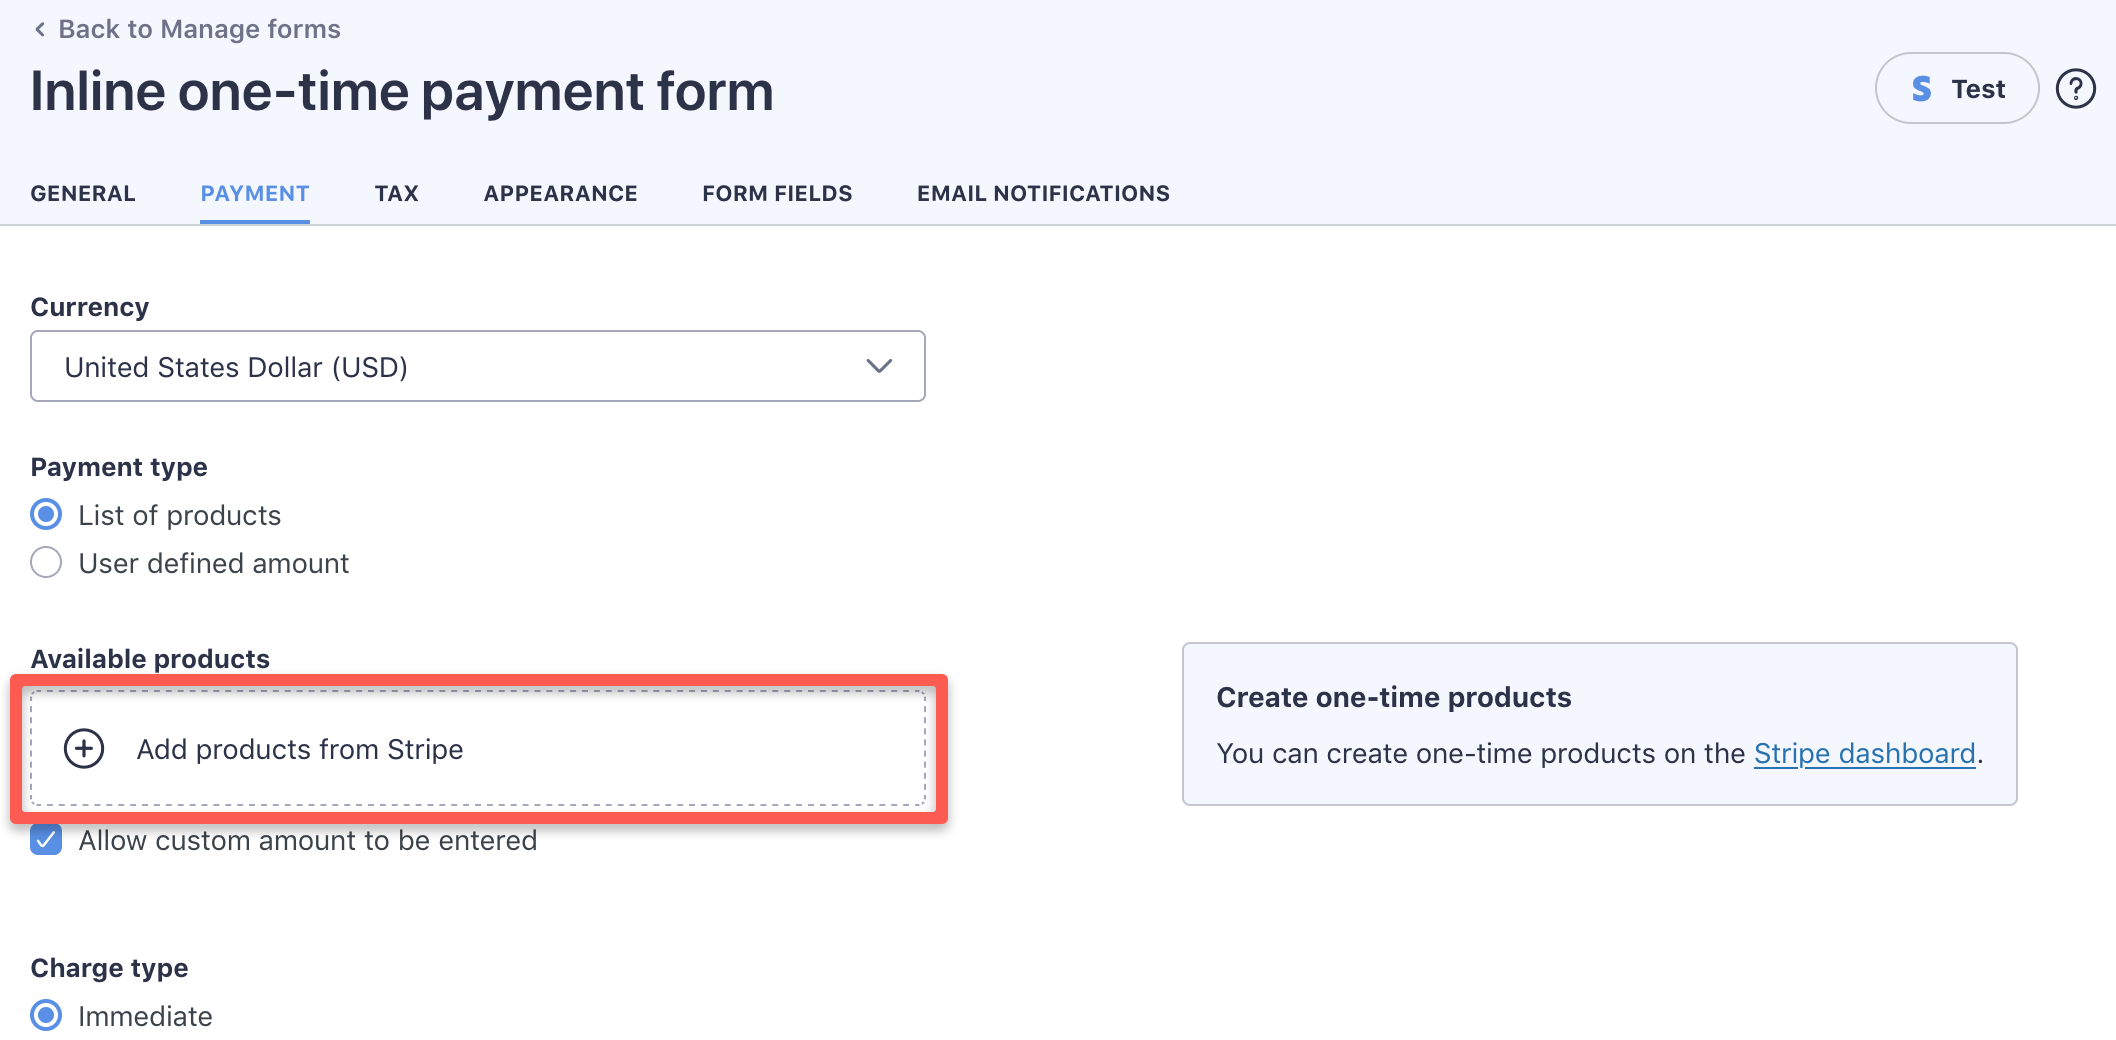
The dialog fetches the products from Stripe, you can select several products, and add them to the form at once:

When the form is saved, you’re ready to try it out.
For all customization options of the form, please go to the Customization section.
5. Insert form shortcode into a page
You can obtain the form shortcode on the “Full Stripe → Forms” page.
Please visit our dedicated knowledge base article on how to use shortcodes.
6. Test-drive form
Once the form shortcode is inserted into a page, you can open the page, and test your form.
The form is fully-functional in test mode, and you can make payments using test cards to simulate every possible payment outcome.
No need to refund your payment after testing either.
7. Customize form
Now that the form is up and running, you can customize the form if needed:
- Create a Thank you page
- Configure email notifications
- Set up tax collection
- Change labels or translate the plugin labels
- Customize the form with CSS
- Add Stripe badge to the payment page
- Create a Customer portal page
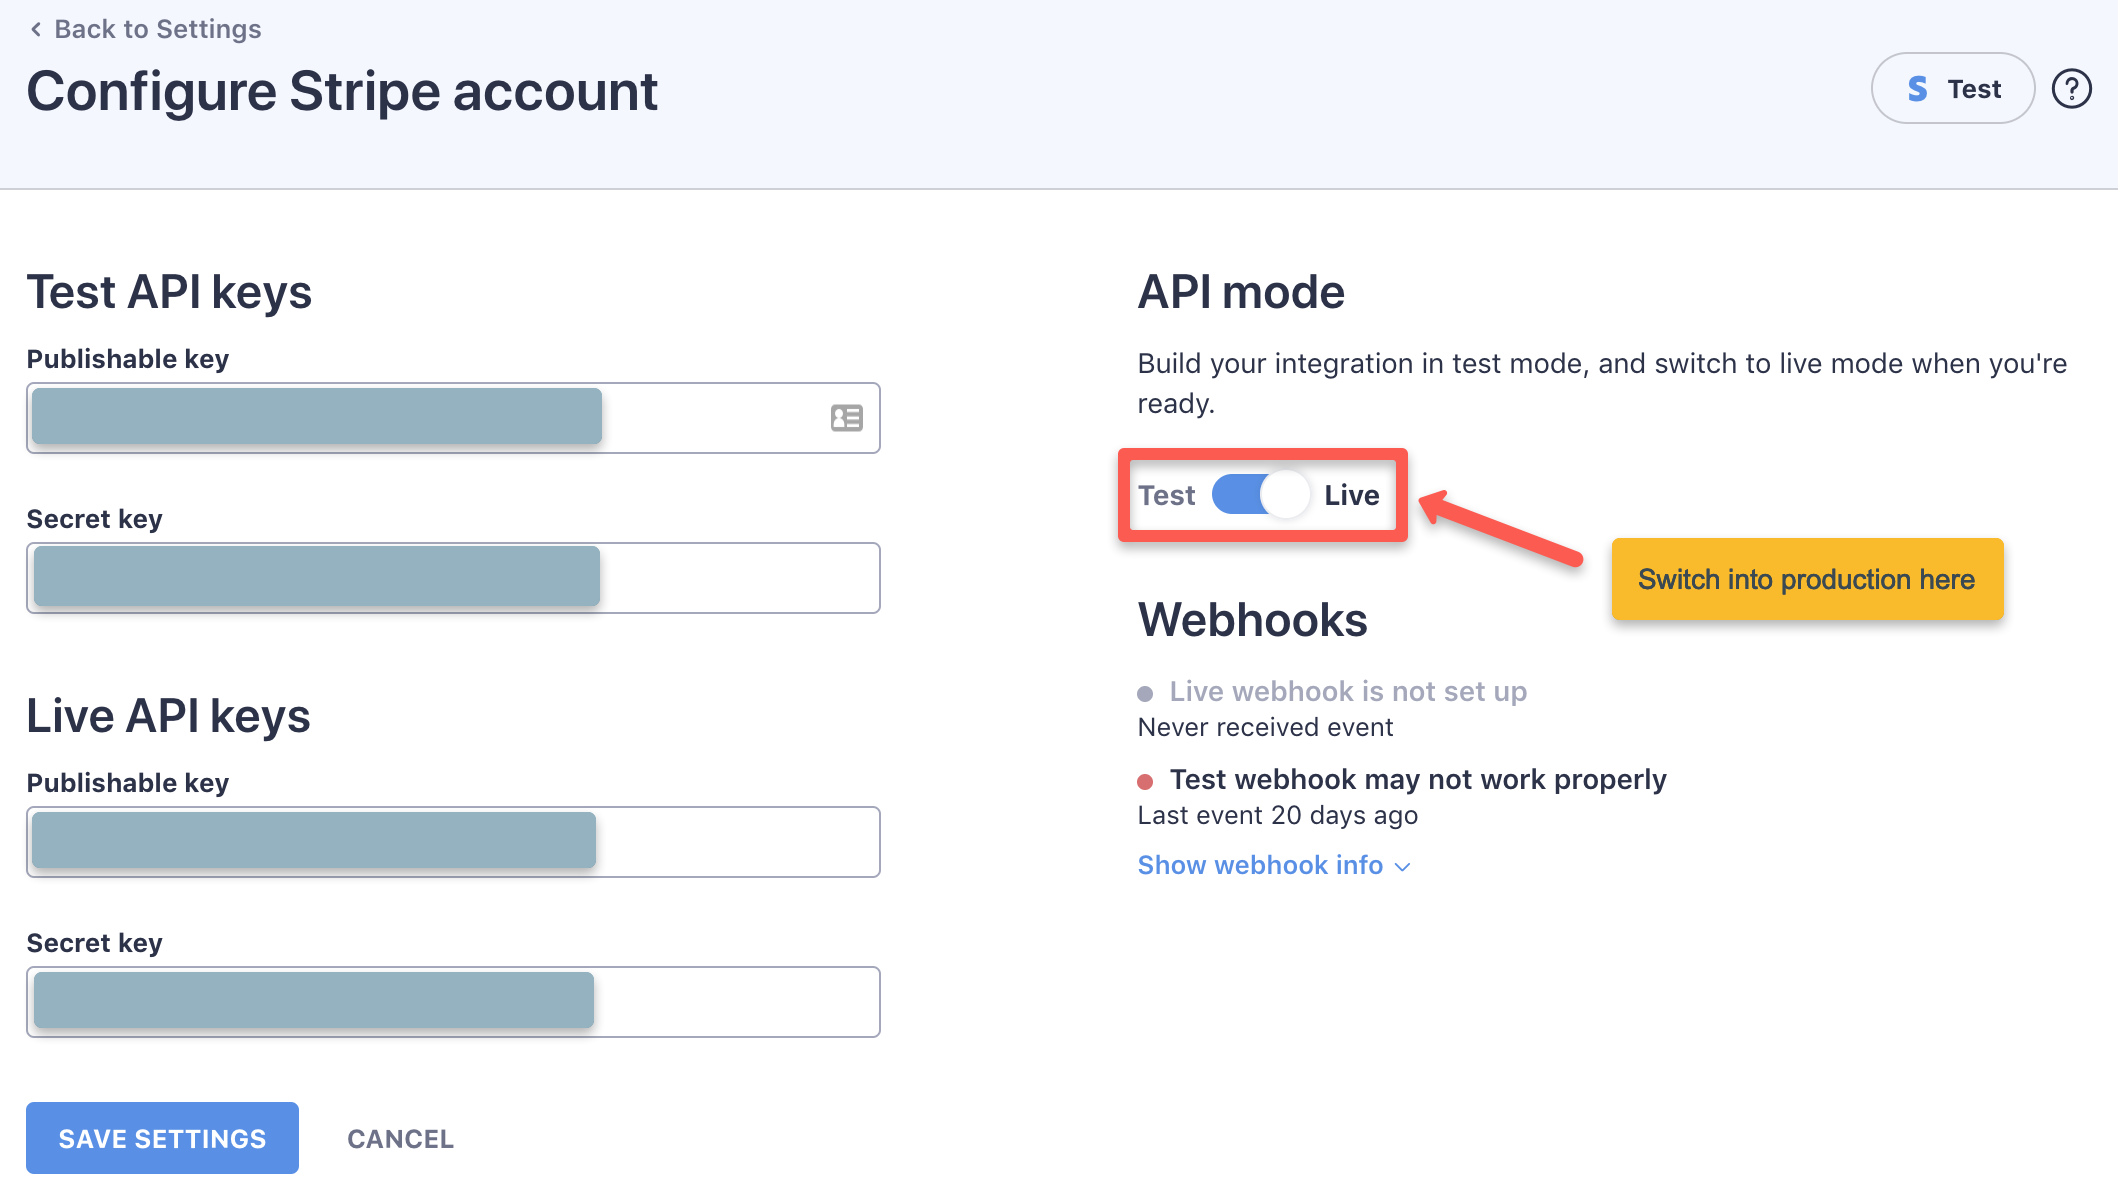
8. Switch to live API mode
When you’re ready to go into production, there are only two things left to do:
- Copy your Stripe products to live mode
- Switch the plugin to live mode
You can flip the switch on the “Full Pay → Settings → Stripe account” page in WP admin: