A payment button looks simple, but the click is only the start of the payment flow. The offer, form layout, checkout settings, confirmation, and test process all have to agree before the button is ready for customers.
This guide shows how to add a Stripe payment button to WordPress with WP Full Pay. You will choose between a compact checkout button and an inline form, create the payment form, embed it, test it, and improve the button copy and accessibility.
WP Full Pay is the product covered by this site, which is why the practical steps use it. The workflow focuses on a single payment action, not a full store, cart, inventory, or fulfillment system.
Table of contents:
A WordPress payment button is a call to action that starts a payment flow. A label such as Buy now, Pay invoice, or Donate tells the visitor what will happen after the click.
The button is not the payment system by itself. It belongs to a form that carries the product or amount, currency, customer fields, payment settings, and success behavior. With a WP Full Pay Checkout form, the button sends the customer to a Stripe hosted checkout page and then returns the customer to your site.
A Buy now button is simply one version of a payment button. It suits a defined offer that a visitor can purchase immediately. An Add to cart action serves a different journey because it lets a shopper keep selecting items before checkout.
WP Full Pay supports Checkout and Inline layouts. The right choice depends on how much information the customer should see before clicking and where the payment fields should appear.
| Layout | What the visitor sees | Best fit |
|---|
| Checkout | A compact button, with optional product selection or extra fields, followed by a Stripe hosted checkout page | A focused payment action, a pricing table, or a page with limited space |
| Inline | The payment form fields on the current WordPress page | A page where customers should review and complete the whole form without leaving it |
If the page needs only a clear action that leads to checkout, choose the Checkout layout. If customers need to see fields before they commit, use an Inline layout. The Stripe payment form guide covers the wider choice among one time, subscription, donation, and save card forms.
📖 For a simple sales setup without WooCommerce, read how to sell products on WordPress without a store platform.
Step 1: Install and connect WP Full Pay
In WordPress, go to Plugins → Add New Plugin. Find WP Full Pay in the WordPress plugin directory, then install and activate it.
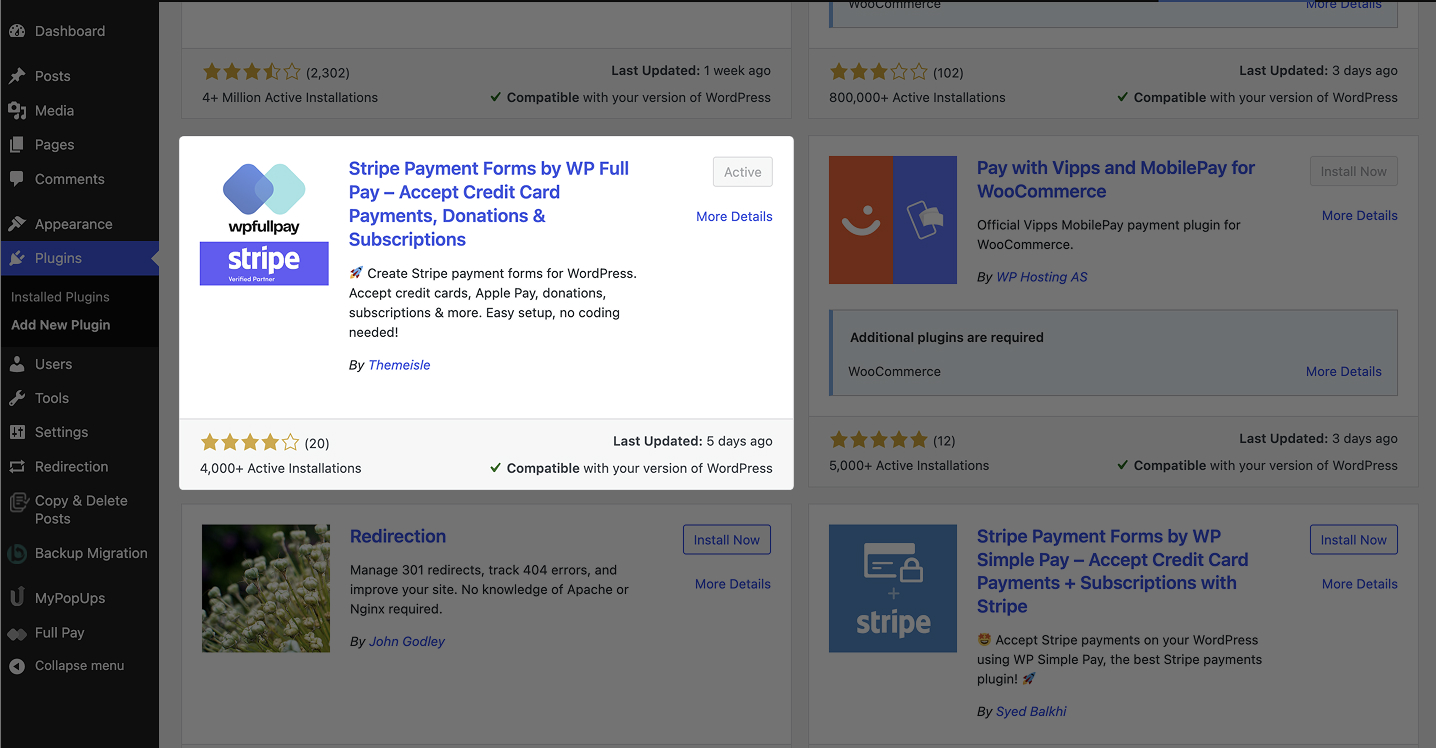 The WP Full Pay listing in the WordPress plugin directory after activation.
Next, open Full Pay → Settings → Stripe account. Select Test Account Mode and use Connect with Stripe for the account that should receive payments. The current connection process is documented in the official WP Full Pay Stripe setup guide.
💡 Stay in test mode: Stripe keeps test and live data separate. Build and verify the test flow before creating the live version.
Step 2: Create a Stripe product and price
For a fixed one time offer, open the Stripe Dashboard in test mode and go to Products → Overview, then select + Add product. Add a clear product name, choose one time pricing, set the amount and currency, then save the product.
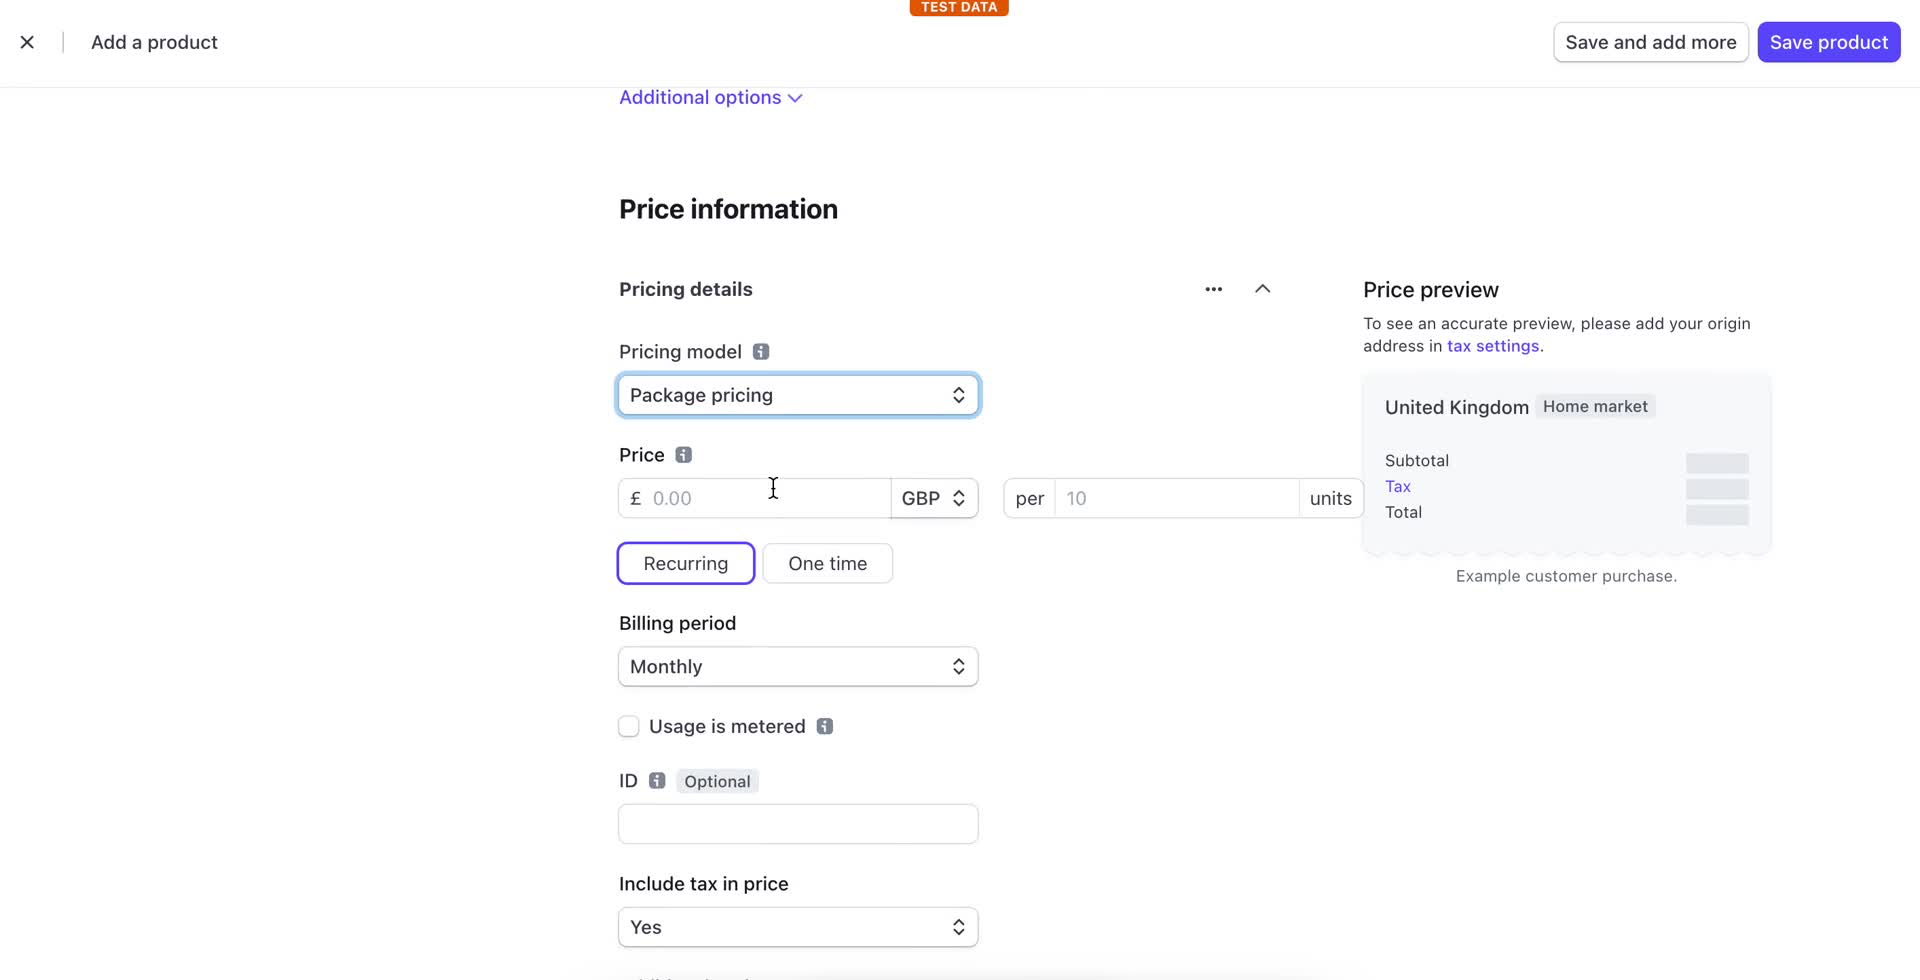 Create the test product and price that the payment form will use.
The product name and amount become part of the customer’s decision, so proofread them before moving on. If the use case does not need a fixed product, such as a customer entered invoice amount, follow the relevant form settings instead of forcing a product into the flow.
In WordPress, go to Full Pay → Payment Forms and select Add form. Choose a one time payment form, enter an internal name and display name, select the Checkout layout, then create the form.
On the Payment & Tax tab, use Add products from Stripe and select the test product. The official one time form tutorial shows the current sequence and the settings that follow it.
Configure only the fields needed to complete the transaction. Confirm the currency, product, tax choice, billing or shipping fields, success message, receipt behavior, and button label. Extra fields add work for the customer, so every field should have a clear purpose.
 A current official WP Full Pay example: Checkout layout renders a compact payment button on the WordPress page before Stripe-hosted checkout opens.
Return to Full Pay → Payment Forms and copy the form shortcode from the Shortcode column. Edit the destination page, add a WordPress Shortcode block, paste the shortcode, and preview the page.
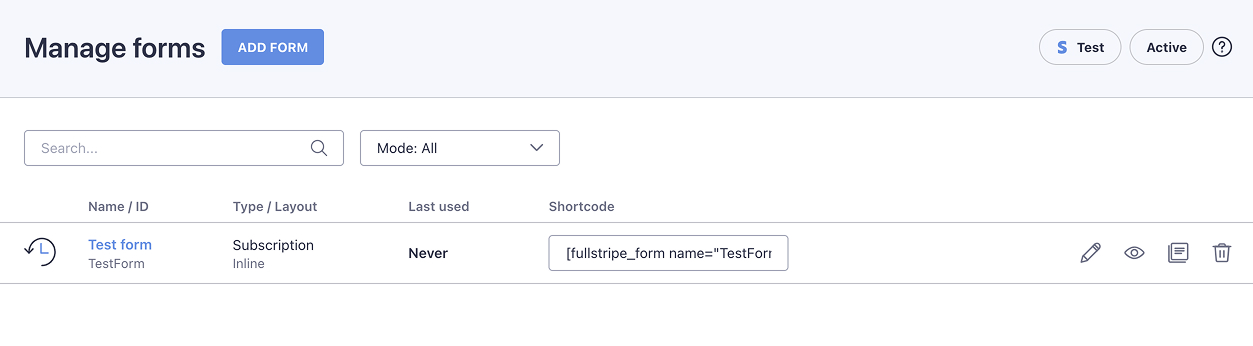 Copy the form shortcode, then place it in a Shortcode block on the payment page.
Place the button close to the offer name, total price, currency, and any recurring terms. A visitor should not have to infer what the click will charge or whether the payment repeats.
Step 5: Test the complete checkout flow
Open the page in a private browser window and use Stripe’s official test values, never a real card. Test a successful payment, a declined payment, and an authentication case. Confirm the amount, currency, product description, error handling, return page, email receipt, and Stripe record.
Repeat the flow on a phone and with a keyboard. After the test version passes, create or copy the needed live product and price, connect Live Account Mode, confirm that the form uses live objects, and run one controlled live transaction.
The best label names the action and matches the offer. Buy now works for an immediate purchase, while Pay invoice, Book and pay, Donate, or Start subscription can be clearer for other payment models.
- Use a short verb and object when the context is not obvious.
- Keep the same action wording in the page heading, button, checkout page, and confirmation.
- Avoid vague labels such as Submit or Continue when the click opens payment.
- State the amount, currency, billing interval, and cancellation terms near the button when they apply.
Color and size can make the action easy to find, but they cannot repair unclear copy. Keep one primary payment action in each offer section and give secondary links quieter styling.
A payment button should work for customers who use a keyboard, zoomed text, or assistive technology. Use the real button generated by the form instead of an image that only looks clickable.
- Check that Tab reaches the button in a logical order and that focus remains visible.
- Make the visible label describe the payment action. Do not hide essential meaning in nearby graphics.
- Use sufficient contrast for text, button states, errors, and focus indicators.
- Leave enough space around the target so it is comfortable to tap without activating another control.
- Test validation messages at 200 percent zoom and confirm that the message identifies the field that needs attention.
💡 Quick check: Complete the payment test without a mouse. If the active control disappears or the checkout becomes confusing, fix that path before launch.
Confirm that the form is saved, the full shortcode is inside a Shortcode block, and the page cache has been cleared. Temporarily test the shortcode on a plain page to separate form configuration from page builder or theme conflicts.
The product or price is missing
Check the active Account Mode first. A test form cannot use a live product, and a live form cannot use a test product. Open the form’s Payment & Tax tab and select the matching product again.
A payment method is not shown
Do not promise that every customer will see every method. Stripe and WP Full Pay availability can depend on the Stripe account, form layout, country, currency, customer, and method status. Check the current WP Full Pay payment method guidance for the form being used.
Yes. A payment button can suit a single product, service, booking, invoice, donation, or subscription when the page does not need a cart, inventory, shipping calculation, or a multi item checkout.
No. With the Checkout layout, the payment page is hosted by Stripe. For WP Full Pay forms, sensitive payment data is sent directly to Stripe rather than stored as raw card numbers in WordPress.
Yes, when the button belongs to a properly configured subscription form and the recurring terms are clear. Do not turn a one time form into a subscription only by changing its button label.
Do you need code?
No code is required for the standard WP Full Pay workflow. You create the form in WordPress, copy its shortcode, and place that shortcode on the payment page. Custom CSS is optional and should be tested after the basic payment flow works.
- The button label matches the offer and payment model.
- The product, amount, currency, tax, and recurring terms are correct.
- Success, decline, and authentication tests pass in Test Account Mode.
- The flow works on mobile, at zoom, and with a keyboard.
- The live form uses live products and the intended Stripe account.
- The return page, receipt, and Stripe transaction record show the expected result.
A reliable WordPress payment button is clear before the click, predictable during checkout, and verified after payment. Build that complete path first, then refine the styling around it.