Stripe API keys are secure access codes that connect your website or application to Stripe, the payment processor.
Stripe API Keys allow you to process online payments, manage transactions, and perform various operations related to your Stripe account.
If you’re using a payment plugin for your WordPress site like WP Full Pay to accept Stripe payments, you need to get Stripe API Keys to connect Stripe and your WordPress site.
Stripe provides four types of API keys: two are used for your test environment and the other two are for your live environment.
Each pair of keys is designed to function in its respective environment, ensuring secure and appropriate handling of transactions depending on whether you’re testing or live.
In this article, we’ll look closer at all the types of stripe api keys and use cases.
We’ll also cover:
- How to generate and access your API keys?
- Stripe keys for different operational modes
Let’s get started.
Stripe API keys – Why do you need them?
The purpose of using Stripe API keys is to authenticate Stripe API requests.
When you accept Stripe payments on your website, you need to set up Stripe API Keys to make an API request.
The Stripe API keys are unique to your Stripe account, and this is the only way for the payment gateway to recognize that the API requests were made by your account.
If you don’t include your key when making an API request or use an invalid or expired Stripe API key, Stripe returns a 401 – Unauthorized HTTP response code.
NOTE: With WP Full Pay version 7.0 and later, you no longer need to manually add the Stripe API keys. Stripe Connect makes the integration process easy and allows you to connect your Stripe account directly through the WP Full Pay.
Types of Stripe API Keys
You can find 4 types of Stripe API keys:
- ‘Test Publishable Key’ and ‘Test Secret Key’ for test (sandbox) environment
- ‘Live Publishable Key’ and ‘Live Secret Key’ for live environment
All Stripe API requests occur in either test (sandbox) or live mode.
Also, both sandbox and real modes have public (publishable) and secret keys.
Stripe publishable (public) keys
Publishable keys are used in the frontend code of your website that your customers interact with.
Your publishable Stripe key can be shared publicly and is included in scripts that run in browsers when customers enter their payment details.
Stripe secret keys
Secret keys are used on the server side and allow you to carry out backend operations safely and confidentially. Stripe secret keys should never be exposed publicly as they can perform sensitive operations like creating charges or issuing refunds.
It’s crucial to protect your secret key to prevent unauthorized access to your Stripe account.
For organizations handling highly sensitive payment data, implementing robust protection using data diode technology can add an extra layer of security.
Test Sandbox and live modes
Stripe Test keys are used in a sandbox environment. The Stripe sandbox is the test environment. Here, developers can simulate and test payment processing and other functionalities without handling real transactions or live data.
It’s important to note that API objects created in one mode – environment are not accessible in the other. For instance, a subscription plan created in test mode is not available in live mode, and vice versa.
Learn how to test Stripe transactions.
When should you use the Stripe test mode?
You can use Stripe test or sandbox mode when you test the connection and transaction.
When operating in Stripe’s test mode, real payments are not processed through card networks or providers. Instead, you get simulated accounts, payments, customers, charges, refunds, transfers, and subscriptions.
This simulation is important because it safeguards against accidental charges. Unlike in live mode, where failed webhooks are retried over 72 hours, in test mode, they are retried more quickly, typically within a few hours. To maintain this safe testing environment, always use test credit cards and accounts with your Stripe API keys in test mode.
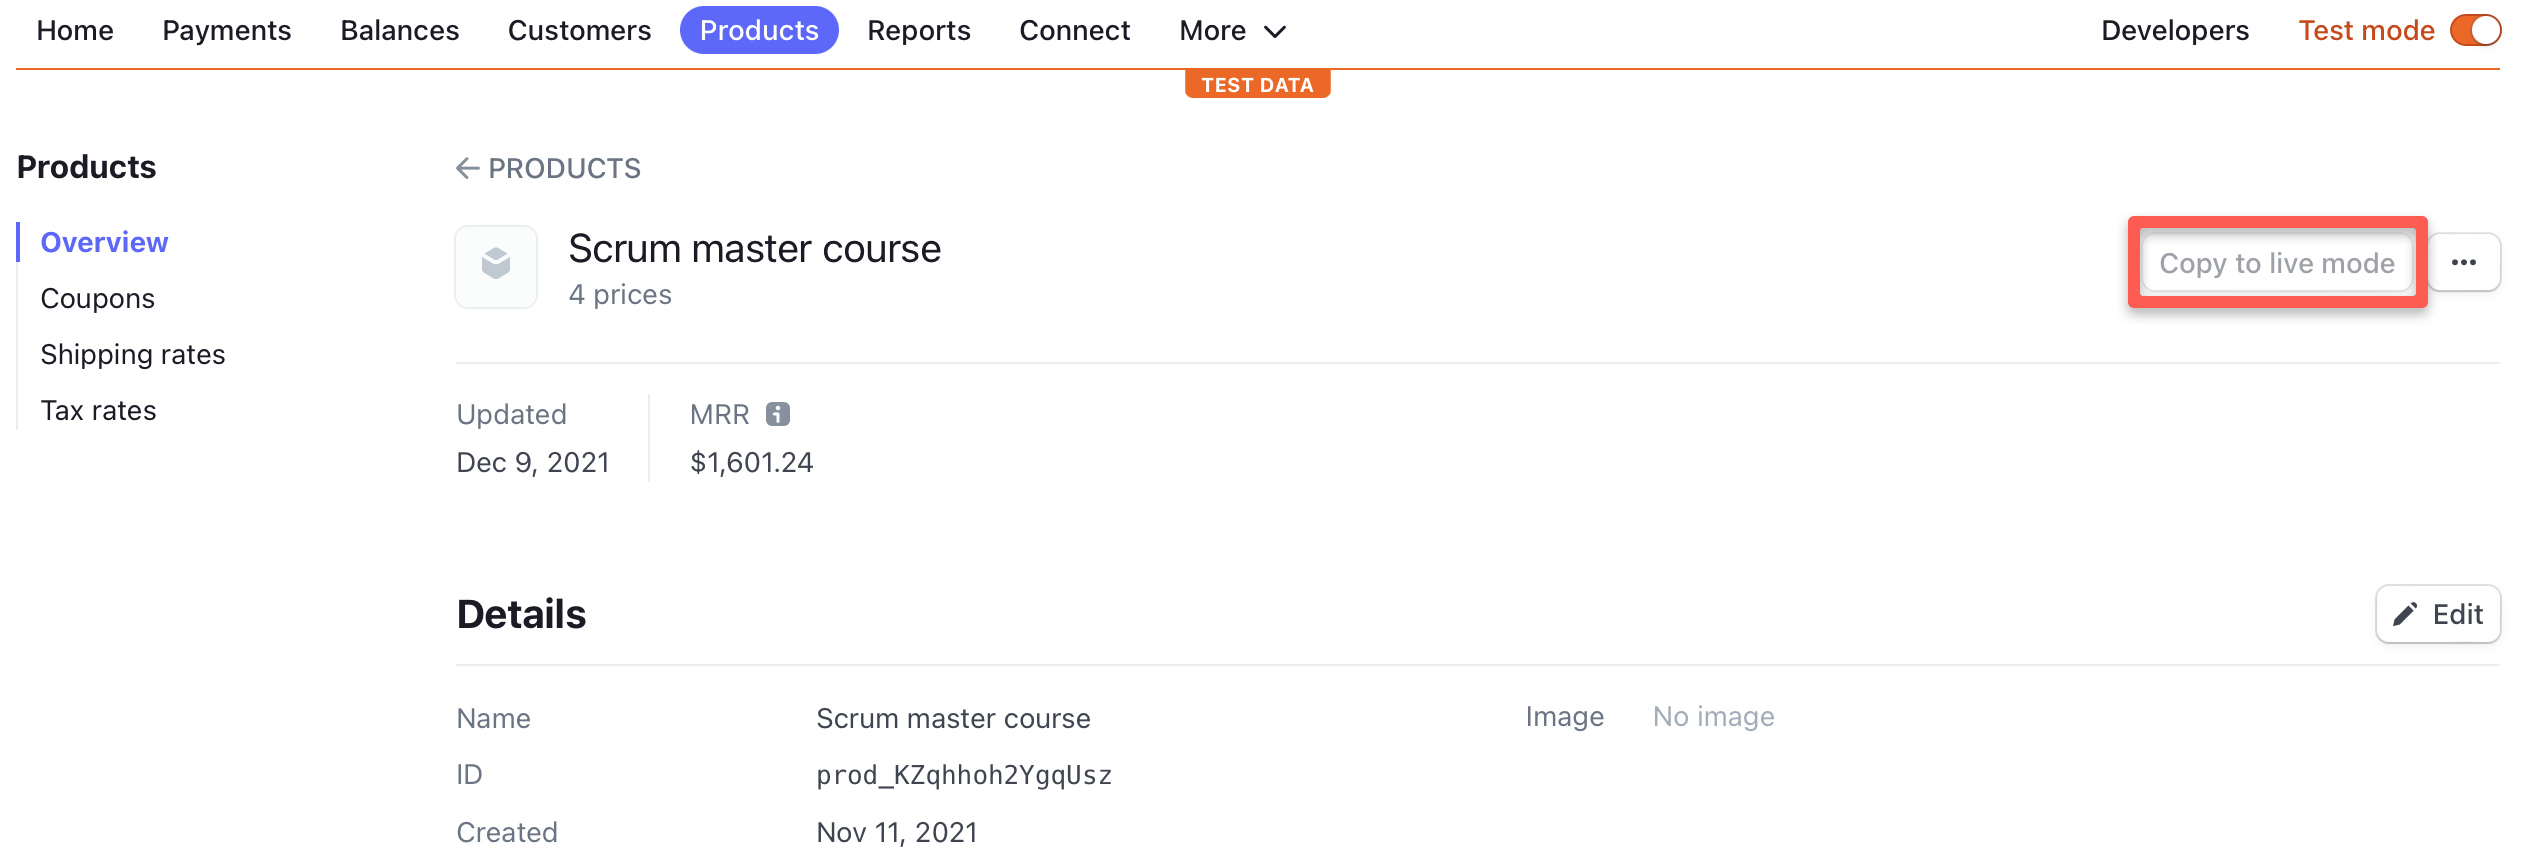
Also, you need to note that Stripe objects – such as plans, products, coupons, tax rates (EU VAT rates), or shipping rates – created in test mode will not be available in live mode.
Therefore, when going live, you need to recreate your products by clicking the “Copy to live mode” button:

When should you switch your Stripe API keys to live mode?
When everything seems to be working on the test environment, and you launch your app, plugin, or website. You can switch to the live mode.
In this mode, all transactions will be live and real, test credit cards and accounts will not work anymore, and the API requests will return real customer accounts, payments, and so on. Use this mode only, if you’re really ready for the launch.
Learn how to switch between test and live mode on WP Full Pay.
How to access your Stripe API keys?
Let’s assume you’re ready to accept Stripe payments on your WordPress site and have chosen WP Full Pay for this purpose.
So, to authorize Stripe API requests, you need to configure Stripe API Keys.
First, ensure that you have created a Stripe account. Next, to get your Stripe API Keys, follow these steps:
- Sign in to your Stripe account.
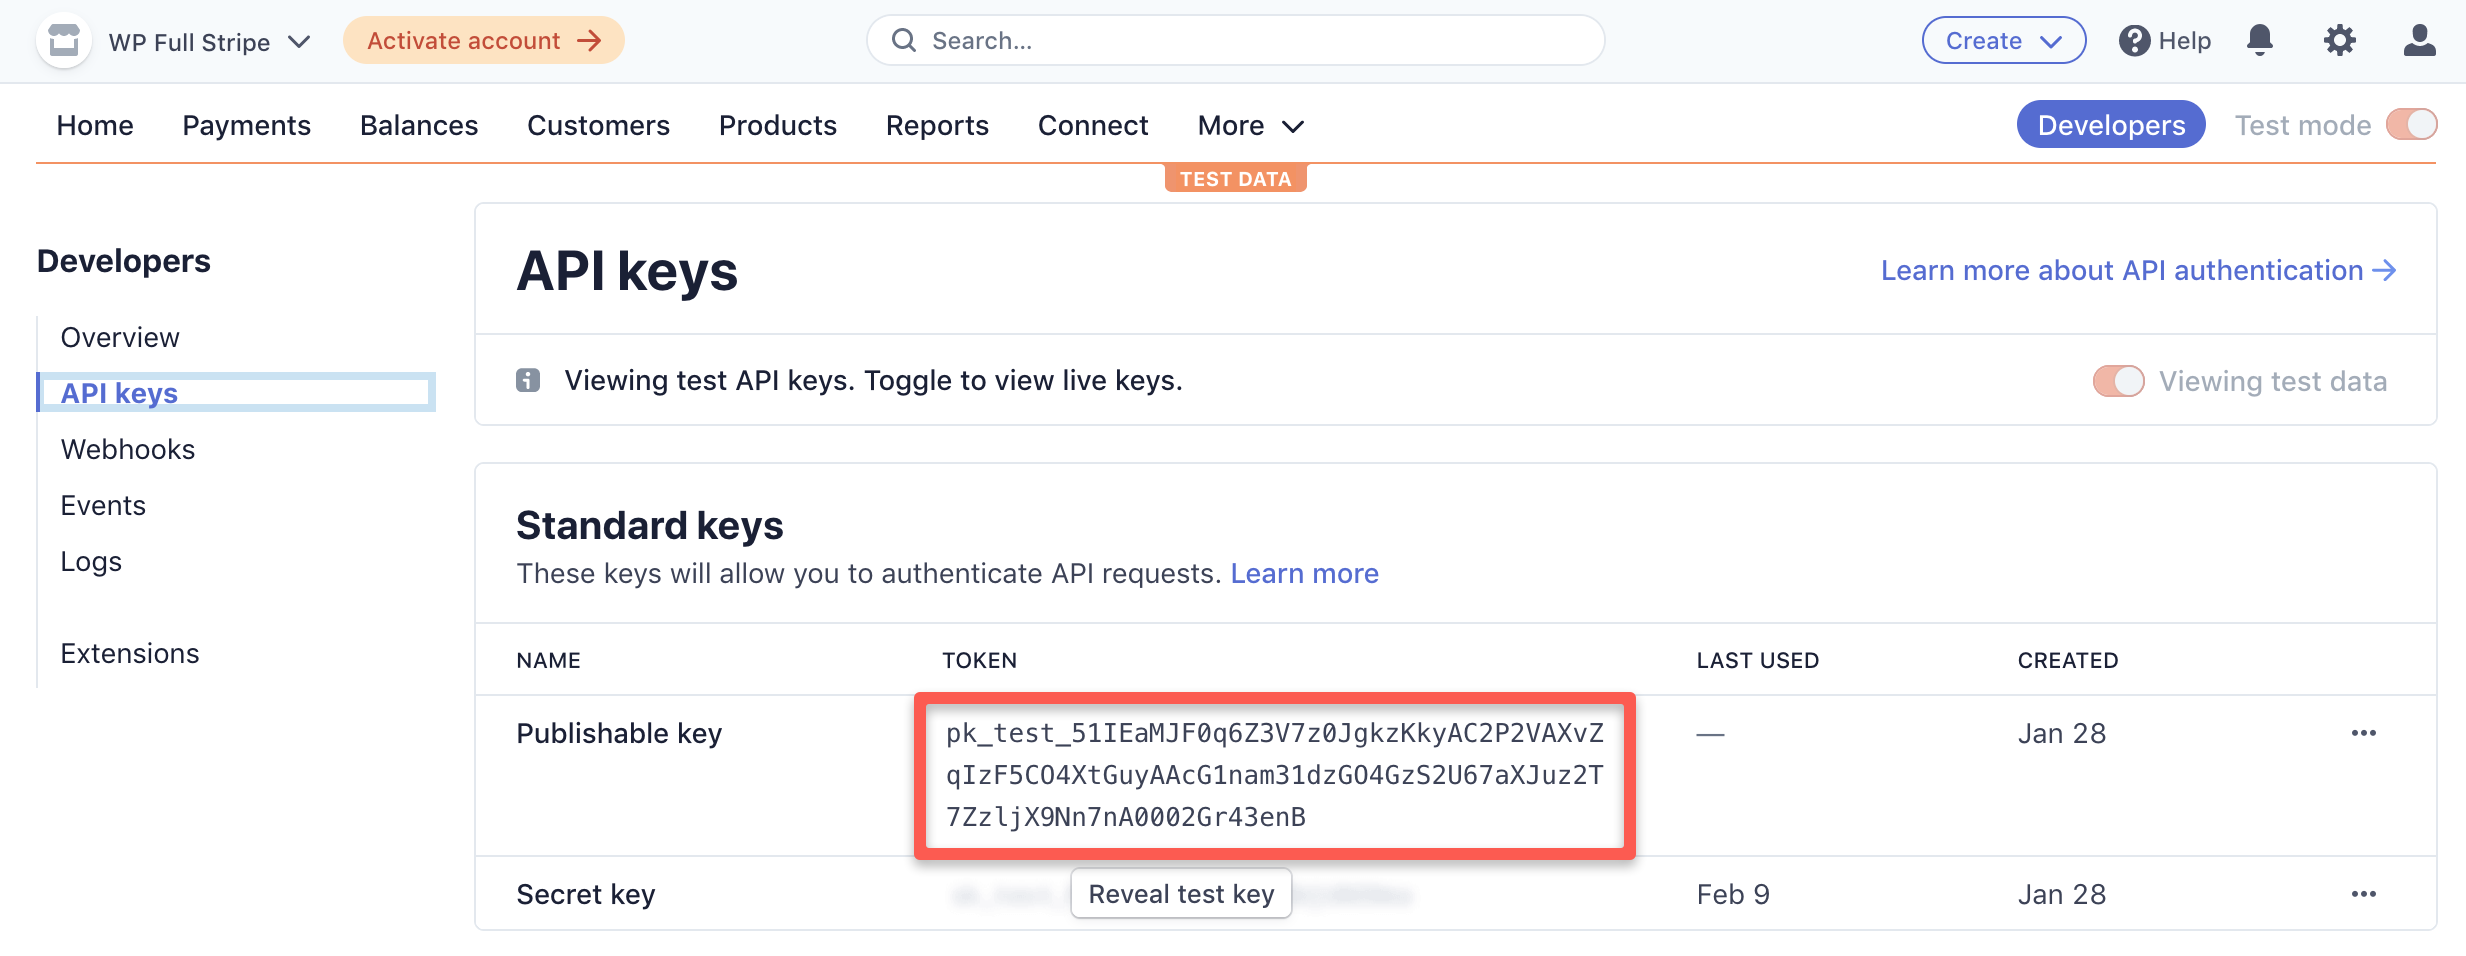
- In your dashboard, click “Developers”, then “API keys”.
- On the “API keys” page, you can find both your publishable and secret keys under “Standard keys”. However, to reveal your secret key, click the “Reveal live key” button.
- Test payments are called “Test mode” and real payments are called “Live mode” in your Stripe account. To switch between these two, click the “Viewing test data” toggle in the menu. Please note that each mode has different keys.

Find a short video below on how to obtain your test and live API keys:
How to keep your keys safe?
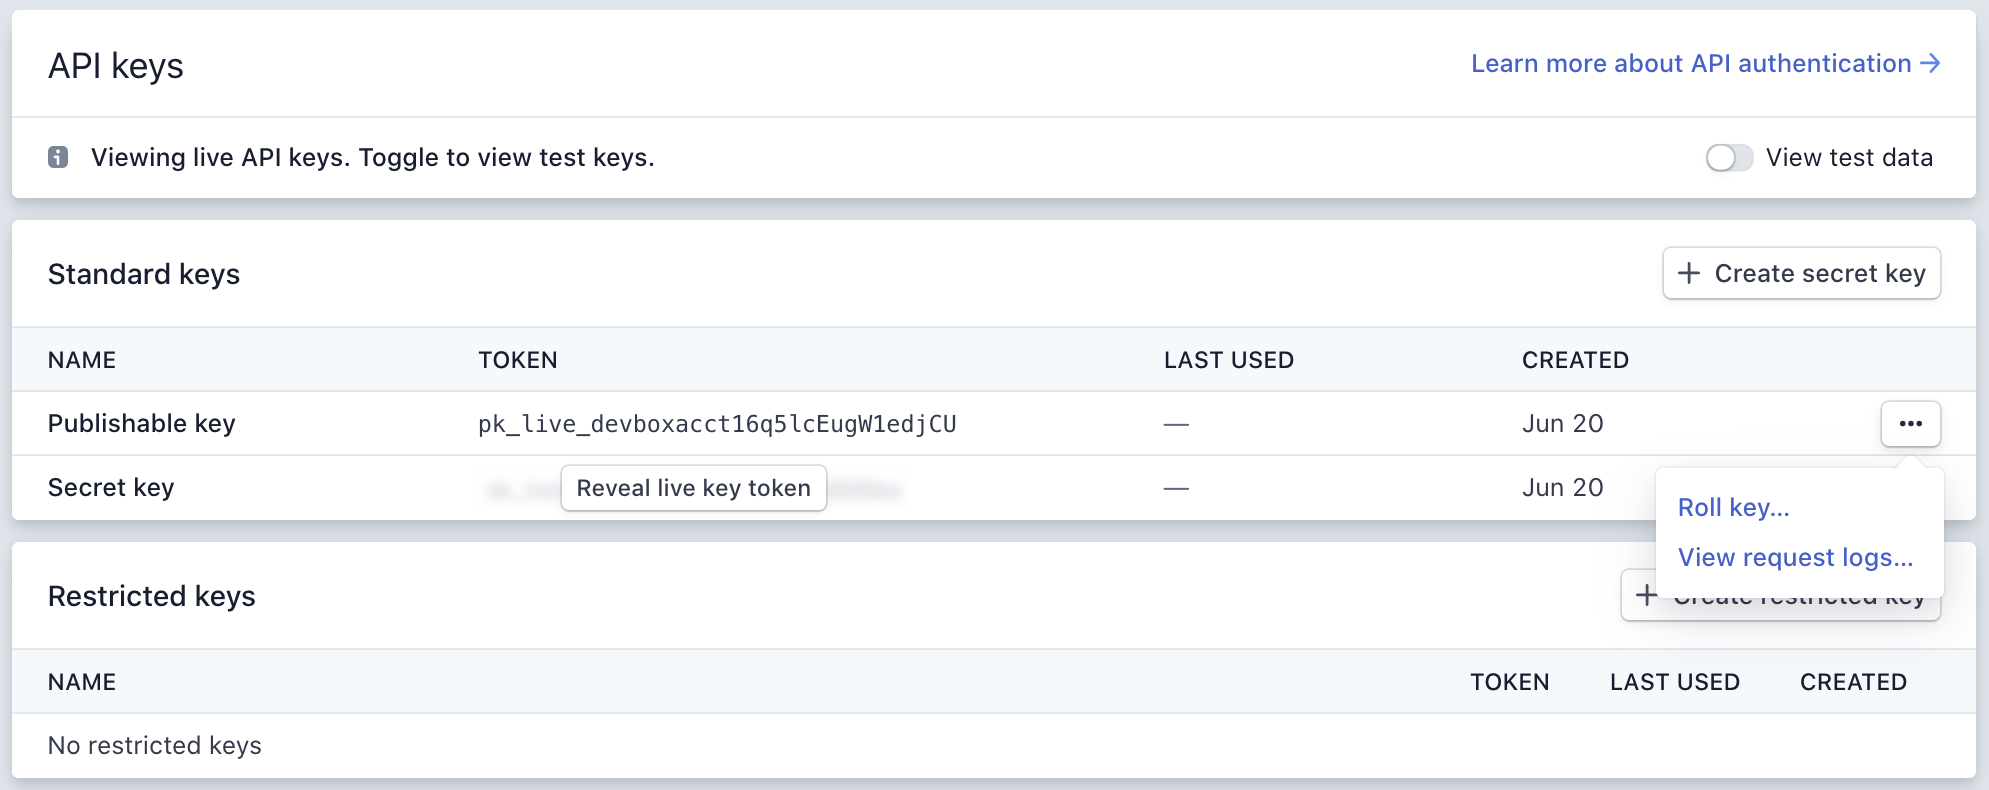
Secret Stripe API keys can be used for API calls such as charging or refunding. Therefore, they should be kept in a safe digital environment. Think of them as passwords. Grant access only to those who need it, and ensure that the key is kept out of any version control system you may be using. To control access to your secret Stripe API key, you might use a password manager, for instance. Make sure to make a note in your dashboard of where you copied the given secret API key:

In case secret Stripe API keys are compromised, one has the option to “roll the key”. This means you can block your key and generate a new one:

When rolling an API key, you can choose to block the old key immediately or allow it to work for 12 hours. The latter option will provide you with time to make the necessary transitions. However, you’ll be able to use the new key immediately in both cases.
Additional security
Secret Stripe API keys can be used for any kind of API request without limitation; therefore, you might want to add another layer of security to keep them safe.
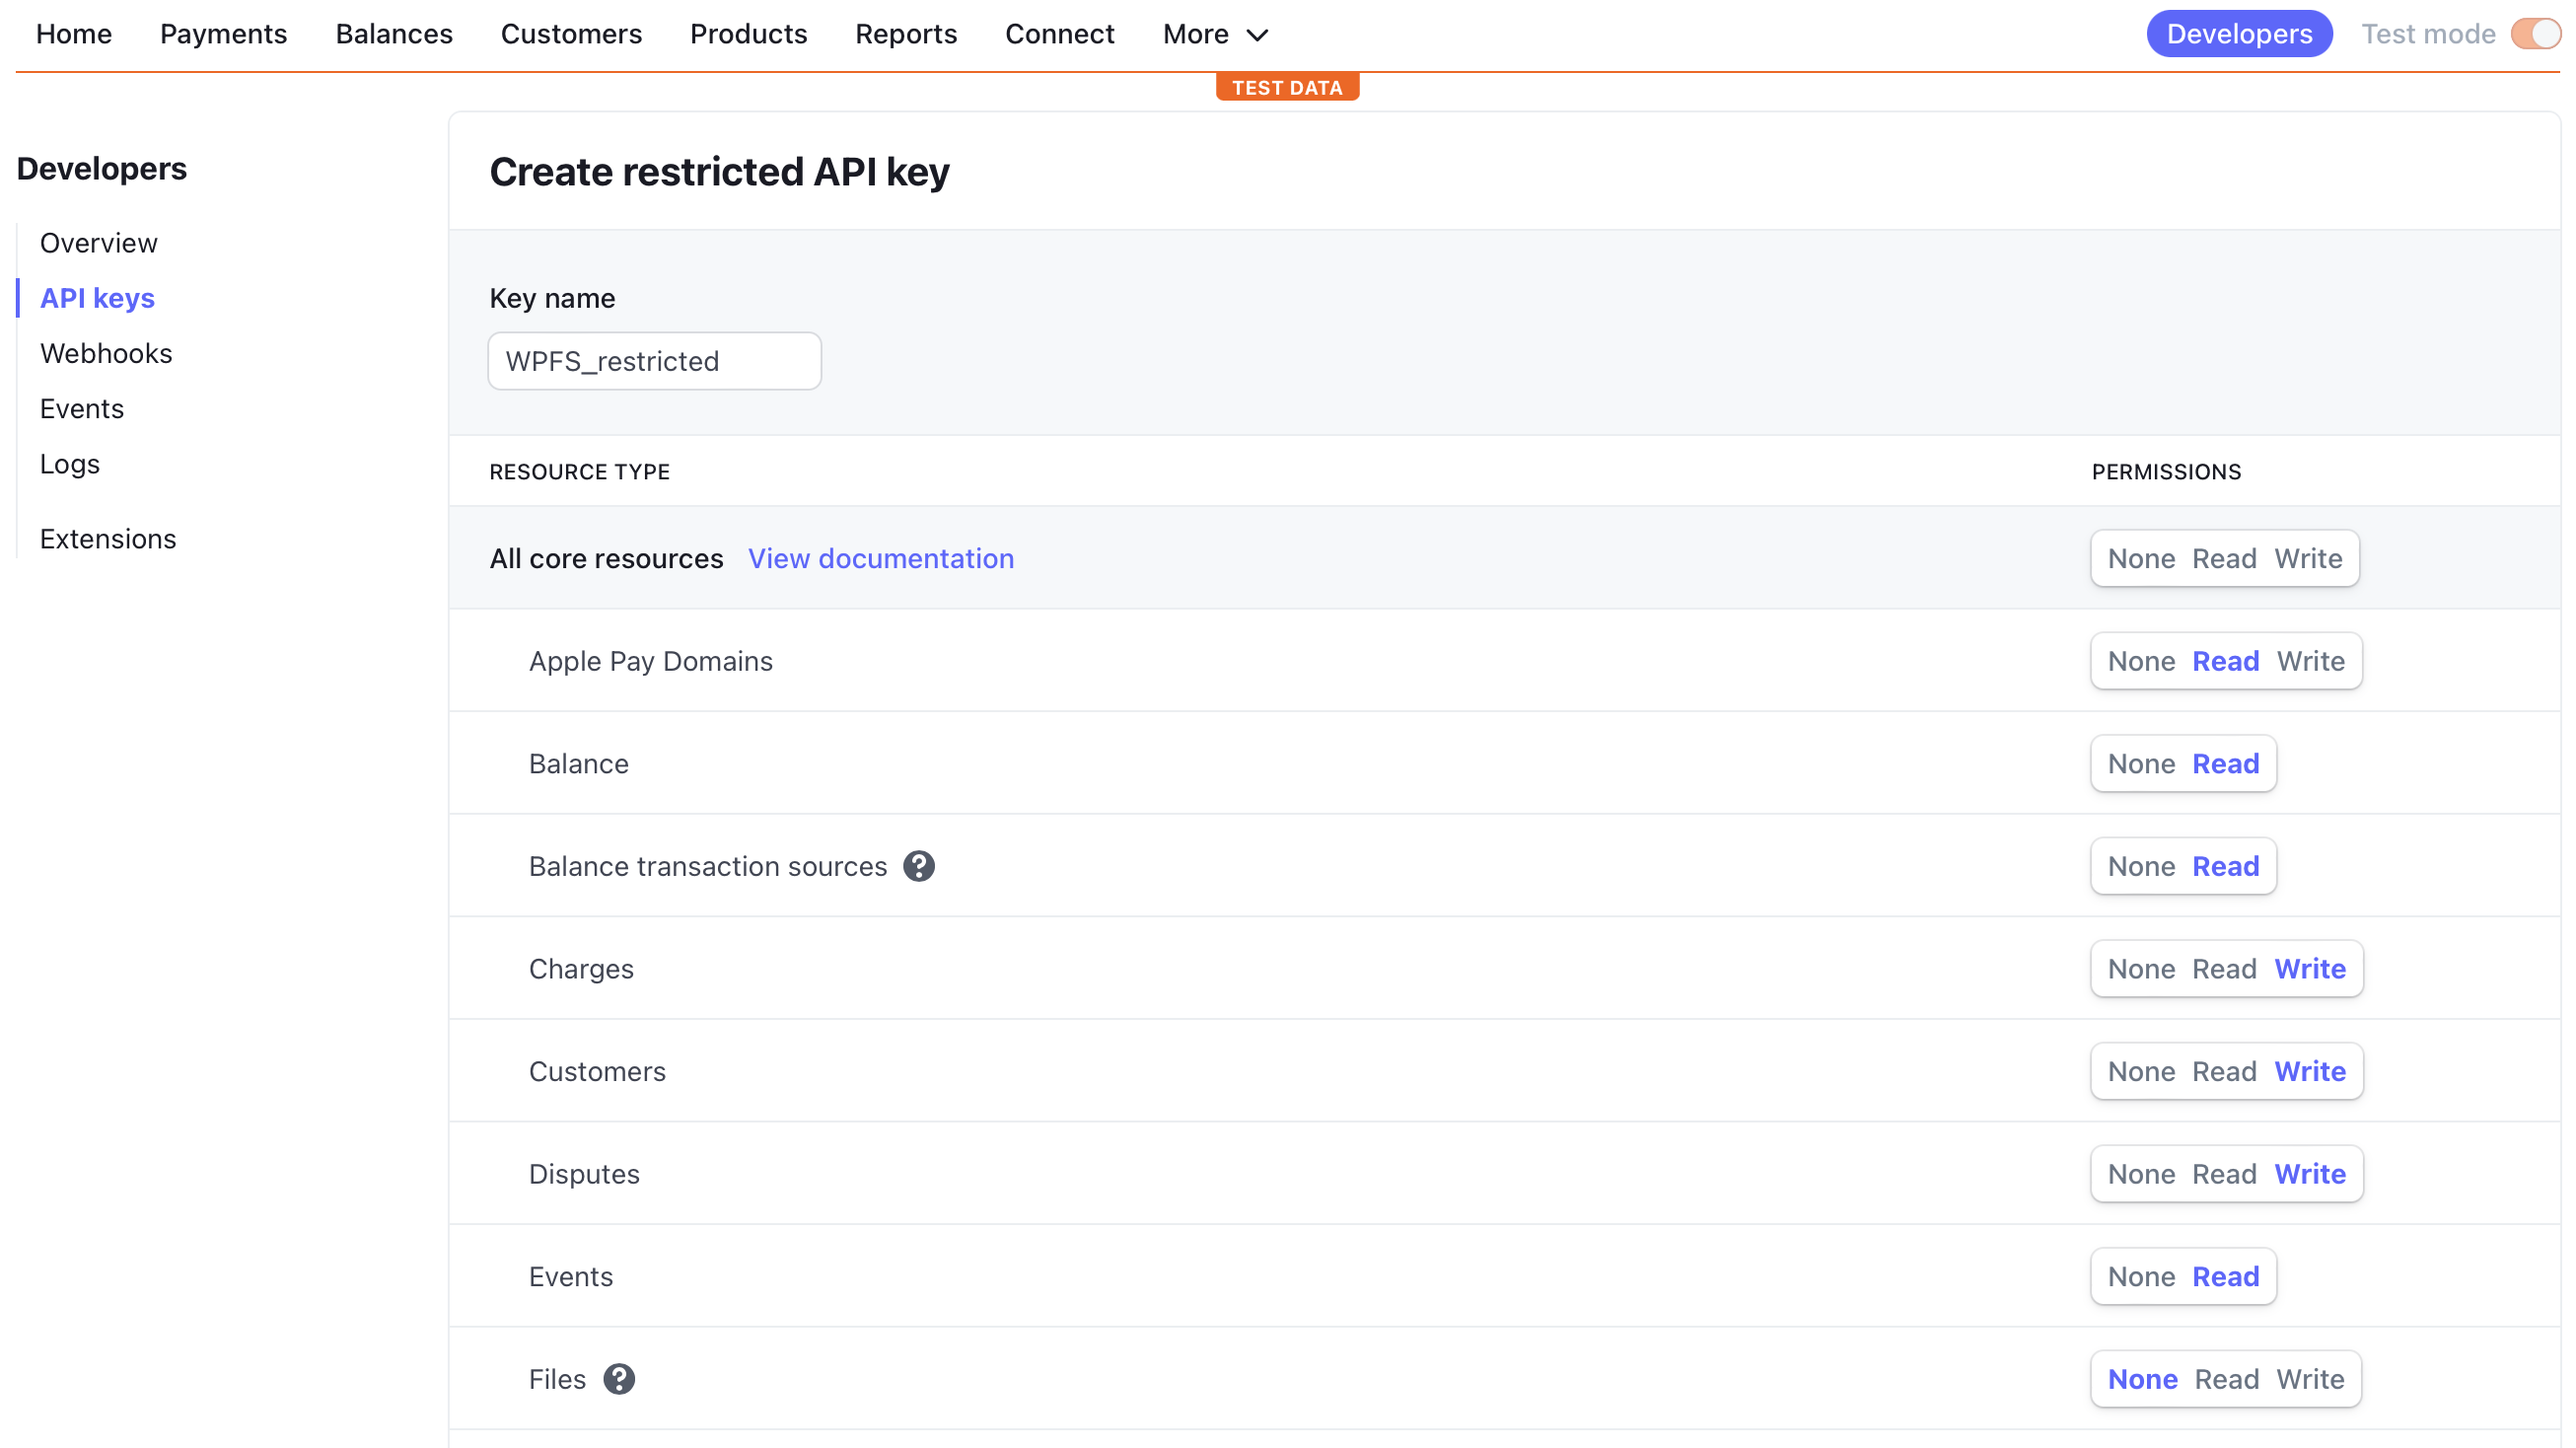
You can create restricted Stripe API keys that enable you to limit access to them. Restricted keys are available to reduce the risks when building or using microservices and they can be revoked anytime if not needed anymore. However, they cannot be used for the development of your Stripe integration. Consequently, use your test API keys during development, and once the integration is live, use your live API keys.

If you need further assistance on how to configure and test your Stripe API keys, you can find more information in the Stripe Docs or the Stripe API Reference.