Choosing between hosted and on-site checkout is an architecture decision, not a contest with one universal winner. A hosted flow sends the customer to a payment page managed by Stripe. An on-site or inline flow keeps the visible payment fields inside the WordPress page.
The practical choice depends on how much page control the business needs, how much checkout maintenance it can own, and which operational risks matter most. This guide compares those tradeoffs for Stripe and WP Full Pay without promising that either layout will always convert better or remove every security obligation.
A mixed approach is valid. A site can use inline forms where page continuity matters and hosted Checkout for a public donation page, a compact pricing table, or another flow with a different risk profile.
Stripe’s product names overlap with general checkout language, so the labels need a clear boundary before any comparison.
- Stripe Checkout is a prebuilt checkout product built on Checkout Sessions. Stripe currently offers a full page that can be hosted by Stripe or embedded, plus a more customizable Elements option.[1]
- Stripe Payment Element is an embeddable UI component. It can be used with Checkout Sessions or the lower-level Payment Intents API, so it is not simply another name for hosted Checkout.[2]
- WP Full Pay Inline displays the form fields on the WordPress page. WP Full Pay Checkout displays a button and redirects the customer to a Stripe-hosted page before returning them to the site.[3]
This article uses hosted and on-site for the WP Full Pay choice. It does not treat every embedded Stripe integration as identical. WP Full Pay is the product covered on this site, so it provides the WordPress example throughout the guide.
📖 Payment Links is a separate workflow. It creates a reusable URL for a Stripe-hosted checkout and is useful when sharing the link itself is the main task. The Stripe Payment Links guide covers creation, sharing, and lifecycle details.
How hosted checkout works
With the WP Full Pay Checkout layout, the WordPress page can show product choices, custom fields, or a payment button. The payment step opens on Stripe’s domain. After the customer completes the flow, Stripe returns them to the site.
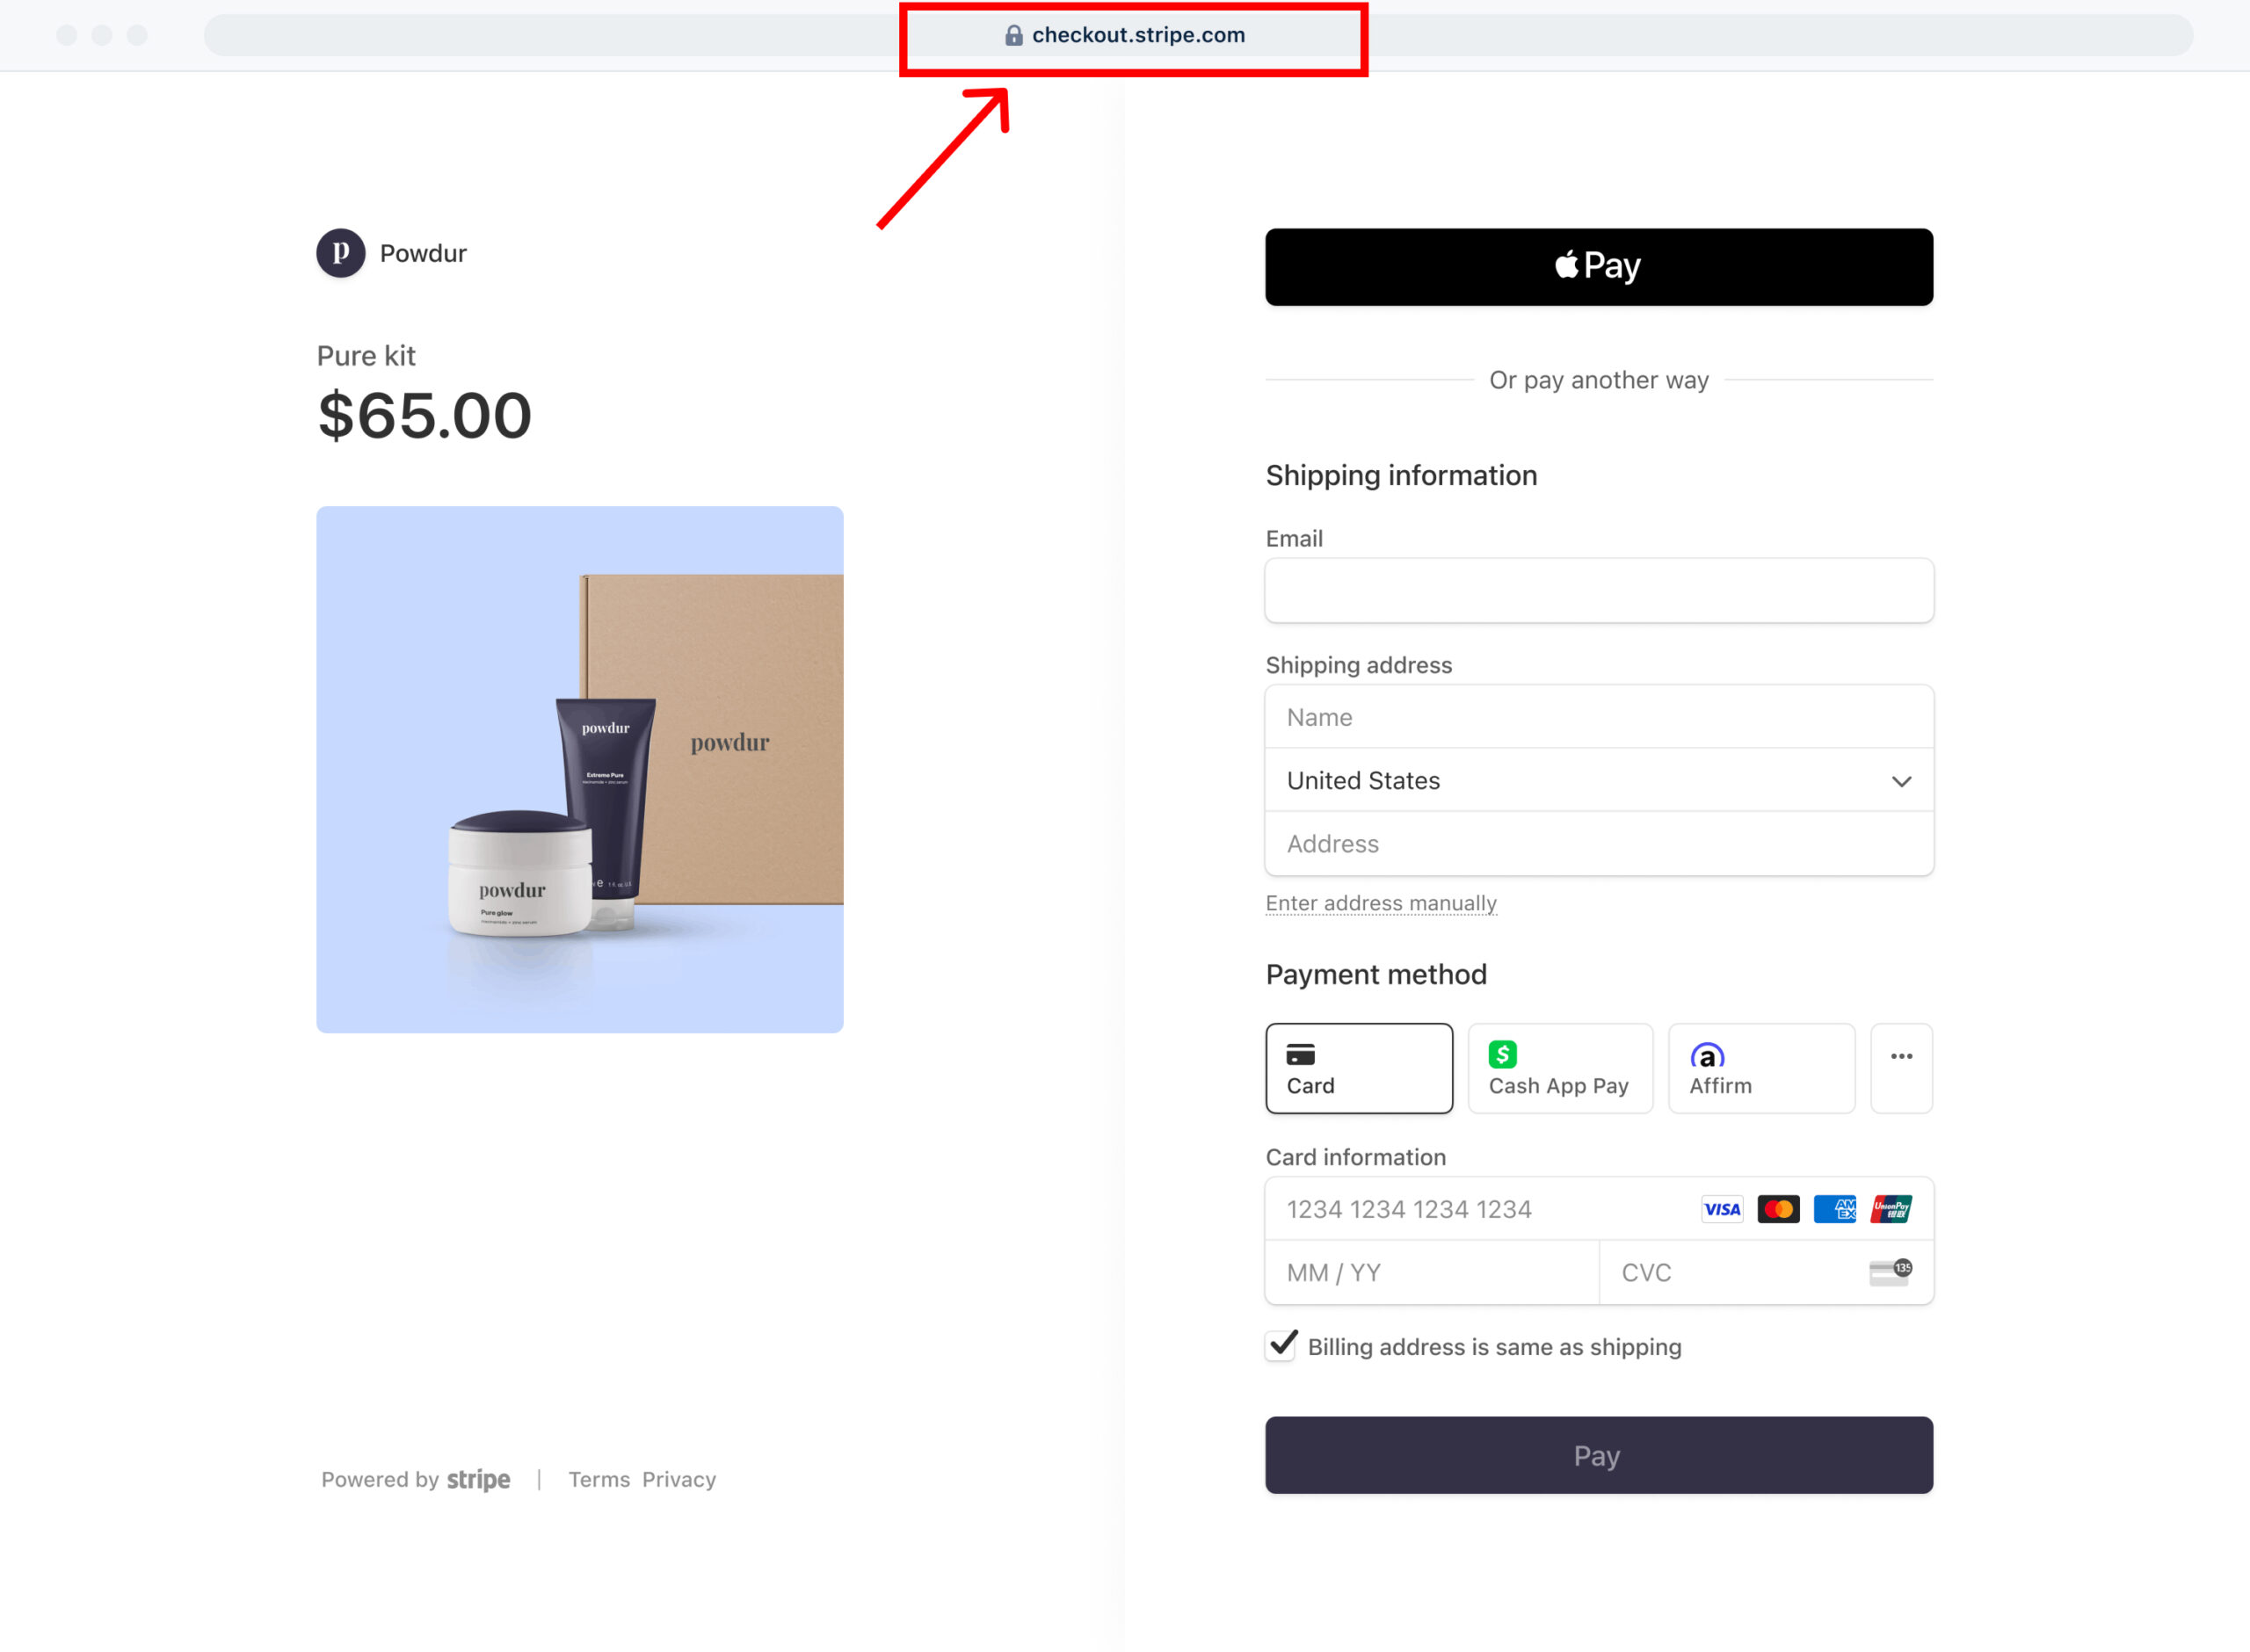 This source-article example shows Stripe-hosted Checkout. The visible methods belong to the demonstration and are not a list of methods available on every WP Full Pay form.
The main benefit is a narrower page-ownership boundary. Stripe manages the checkout surface and can update supported behavior without the merchant rebuilding that page. The site still owns the offer, button, return destination, receipts, fulfillment, policies, and the rest of the customer journey.
The tradeoff is the redirect and a smaller styling envelope. Customers leave the WordPress domain for the payment step, so the button label, pre-checkout explanation, branding, and return page need to make the handoff feel intentional. Any extra fields displayed before the redirect should also be tested as part of the same journey.
How on-site inline checkout works
An inline form keeps the visible payment fields in the page. That makes it easier to place checkout beside product details, donation context, reassurance, FAQs, or a short comparison. It also keeps the form inside the site’s typography and spacing system.
 An inline form keeps the visible payment fields in context. It does not mean that WordPress stores raw card numbers.
More page control also creates more surfaces to maintain. A theme update can change spacing. An optimization plugin can defer a required script. A consent tool, cache, Content Security Policy, or custom CSS rule can affect the form. Inline checkout therefore deserves regression testing whenever the theme, payment plugin, performance stack, or checkout copy changes.
On-site does not guarantee that the customer never leaves the page. A bank authorization, wallet, or 3D Secure step can open another interface or redirect the customer when the payment method requires it. The useful distinction is where the primary form is presented, not a promise of zero handoffs.
Compare control, maintenance, and operations
Page control and brand continuity
Choose inline when surrounding content is part of the decision. This can matter for a configurable service, a donation appeal, or a product that needs concise terms beside the form. Choose hosted when a compact call to action is enough and the business can work within Stripe’s supported checkout customization.
Maintenance and change risk
Hosted checkout reduces the amount of payment UI rendered inside WordPress, but it does not make the whole transaction maintenance-free. The merchant must still test the button, price, currency, customer emails, return path, fulfillment, and mobile journey. Inline adds page-level compatibility and visual checks to that list.
Customer linking and Stripe records
Current WP Full Pay documentation warns that inline-form payments may appear as Guest in Stripe instead of being associated with a Stripe Customer. If receipts, customer portal access, or subscription management depend on that association, the documented workaround is to use a Checkout form. This is an operational constraint, not a visual preference.
Payment methods and wallets
Do not choose a layout by counting logos in a screenshot. Stripe can display methods dynamically based on what is enabled and eligible for the account, transaction amount, currency, payment flow, and customer context.[4] Wallet visibility also depends on the integration, device, browser, and wallet setup.
WP Full Pay adds its own support boundary. Current documentation says form-level payment-method selection is available only for inline one-time forms. Test each important method in the exact form type, currency, and customer market instead of assuming that hosted and inline will show the same options.
Compare card testing and PCI responsibility
Inline forms are public submission surfaces. Bots can begin a payment attempt and create incomplete Stripe records even when no successful transaction reaches WordPress. WP Full Pay’s current card-testing guidance recommends moving an actively targeted public form to the Checkout layout, then using reCAPTCHA v2 and Stripe Radar as additional layers.[5]
That recommendation is not a guarantee that hosted Checkout prevents every attack. Monitor both Stripe and WordPress, investigate sudden failure spikes, and keep an incident path for disabling or replacing a targeted form. The dedicated card testing attack guide covers containment and recovery.
Security language also needs care. Stripe describes PCI compliance as a shared responsibility. Its low-risk integrations can send payment information directly to Stripe without passing through the merchant’s server, which can reduce PCI obligations, but the business still has to accept payments in a compliant way and attest as required.[6]
Neither layout means that WordPress should store raw card numbers. Neither layout makes the whole site secure or automatically completes every merchant compliance duty.
Choose a layout for WP Full Pay
- Start with hosted Checkout when the page needs a compact button, the form is exposed to higher abuse risk, or customer-linked Stripe records are important to downstream operations.
- Start with Inline when the full form must stay beside essential product or donation context and the site owner can test theme, script, mobile, and performance changes regularly.
- Use both layouts when pages have different jobs. Architecture should follow the workflow and risk, not a site-wide rule chosen for visual consistency alone.
The layout is selected when creating the WP Full Pay form, so validate the choice in test mode before replacing an existing live form. The Stripe and WordPress integration guide covers connection and setup steps that are outside this decision guide.
Test the decision before launch
- Run the same offer through both layouts in Stripe test mode when both are realistic candidates.
- Check desktop and mobile, including load time, field visibility, button state, required authentication, and the return to WordPress.
- Verify the Stripe Customer, payment, receipt, and WP Full Pay transaction records needed by support and finance.
- Test a successful payment, a decline, an abandoned submission, and every important wallet or local method that appears for the target market.
- Review fraud signals and incomplete records. Confirm that monitoring and form-disable procedures are usable.
- Choose based on the complete operational result. A small difference in page appearance should not override broken receipts, missing customer links, or an unmanageable risk surface.
Hosted vs on-site checkout FAQ
Does on-site checkout store card data in WordPress?
No. A properly implemented Stripe form sends sensitive payment details to Stripe. Keeping the visible fields on the WordPress page does not mean raw card numbers belong in the WordPress database.
Does hosted checkout always convert better?
No. A hosted page reduces some implementation work, while an inline form can preserve context. Completion depends on the offer, audience, device, payment methods, page clarity, speed, trust, and follow-up path. Test the actual workflow rather than claiming a universal lift.
Can inline checkout show wallets?
It can when the form, account, currency, customer, browser, device, and wallet meet the applicable requirements. The same method may appear for one customer and not another, so test with the intended market and supported setup.
Is Payment Links a third WP Full Pay layout?
No. Payment Links is a Stripe product for creating a shareable hosted checkout URL. WP Full Pay’s layout choice is Inline or Checkout within a WordPress form workflow.
Make the layout follow the workflow
Hosted Checkout is the practical default when lower payment-page maintenance, a compact handoff, customer linking, or reduced inline exposure matters most. Inline is the stronger fit when checkout needs to remain inside a content-rich WordPress page and the site can own the extra testing surface.
WP Full Pay is available from WordPress.org. Build the candidate form in test mode, validate the complete payment and return path, then choose the layout that fits the page’s real operational requirements.
References
- Stripe documentation: Checkout payment UIs
- Stripe documentation: Payment Element
- Themeisle documentation: Inline and Checkout layouts
- Stripe documentation: Dynamic payment methods
- Themeisle documentation: Protecting WP Full Pay forms from card testing
- Stripe documentation: Integration security and PCI responsibility